Partner Console User Guide

A step-by-step guide to every feature of the CRYPTOMENTS v2 Partner Console. Operate a safe, efficient stablecoin payment system.

Doc version: 2.0 Last updated: March 30, 2026 Audience: Partner administrators

1 Introduction

Overview and core features of the CRYPTOMENTS Partner Console.

CRYPTOMENTS Partner Console is the partner administration console for our multi-chain stablecoin payment gateway. Partner admins use it to monitor deposits/withdrawals, manage wallets, review settlements, and configure system settings.

📊
Real-time Dashboard
See today's deposit/withdrawal volume, balances and trends at a glance.
💰
Deposit / Withdrawal
Browse deposit history, submit and approve withdrawal requests, manage whitelists.
👛
Wallet Management
Create HOT/MASTER/POOL wallets and monitor balances.
⚙️
Settings
Configure API keys, Webhooks, Telegram alerts, FX & fee policies.
⛽️
Gas Management
Review on-chain gas records and monthly invoices.

Supported Blockchain Networks

NetworkSupported tokensGasless mechanism
BNB Smart Chain (BSC)USDT, USDCRelayer + one-time Approve
PolygonUSDT, USDCRelayer + one-time Approve
TRONUSDTEnergy rental

2 Getting Started

How to sign in and set things up for the first time.

2.1 Sign In

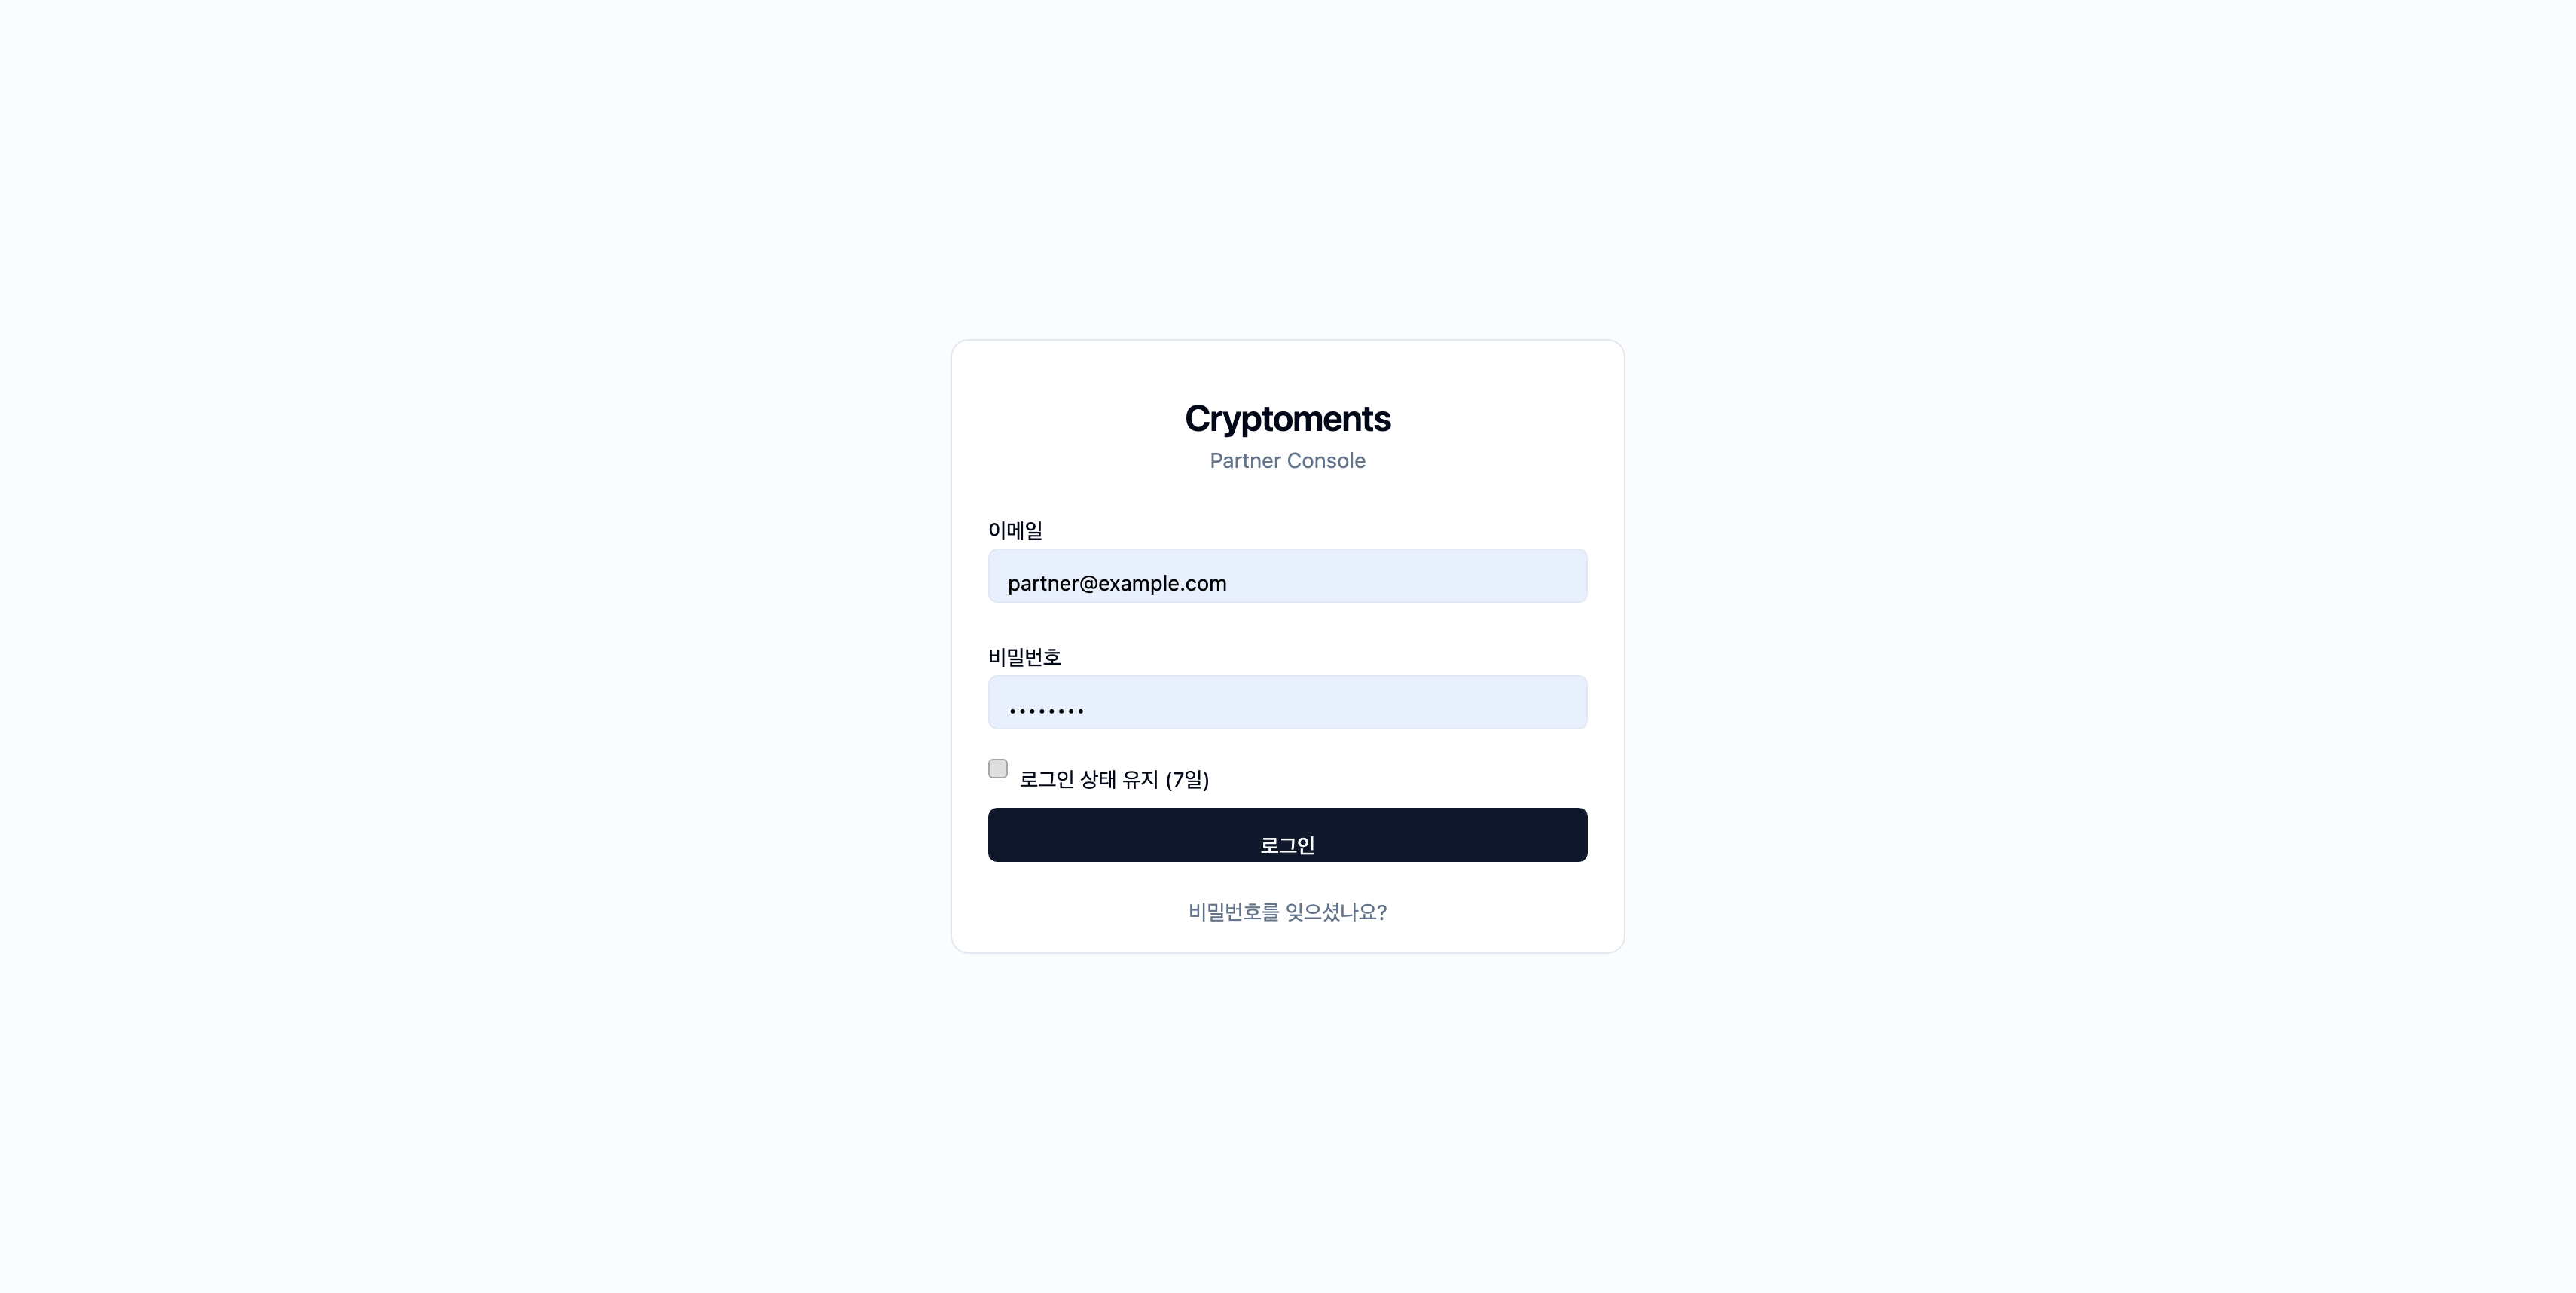
To access the Partner Console you need the email and password issued by your administrator.

1
Open the Console

Open the Partner Console URL in your browser.

2
Enter Email / Password

Enter the email and password you were issued.

3
Remember Me (optional)

Check "Keep me signed in (7 days)" to stay signed in without re-authenticating for a week.

4
2FA (if enabled)

If 2FA (OTP) is enabled, enter the 6-digit code from your authenticator app.

Sign-in screen
Forgot your password?
Click "Forgot password?" at the bottom of the sign-in screen to request a password reset.

2.2 Two-Factor Authentication (2FA)

We strongly recommend enabling 2FA (OTP). Sensitive actions such as withdrawal requests and password changes require OTP.

1
Open Settings

Go to My Account 2FA Setup.

2
Scan the QR Code

Scan the on-screen QR code with an authenticator app like Google Authenticator or Authy.

3
Enter the Code

Enter the 6-digit code shown by your authenticator app to complete setup.

⚠️
Heads up: Without 2FA enabled, a warning banner is shown at the top of the console and some features (withdrawals, etc.) may be restricted.

3 Dashboard

The main screen showing core metrics at a glance.

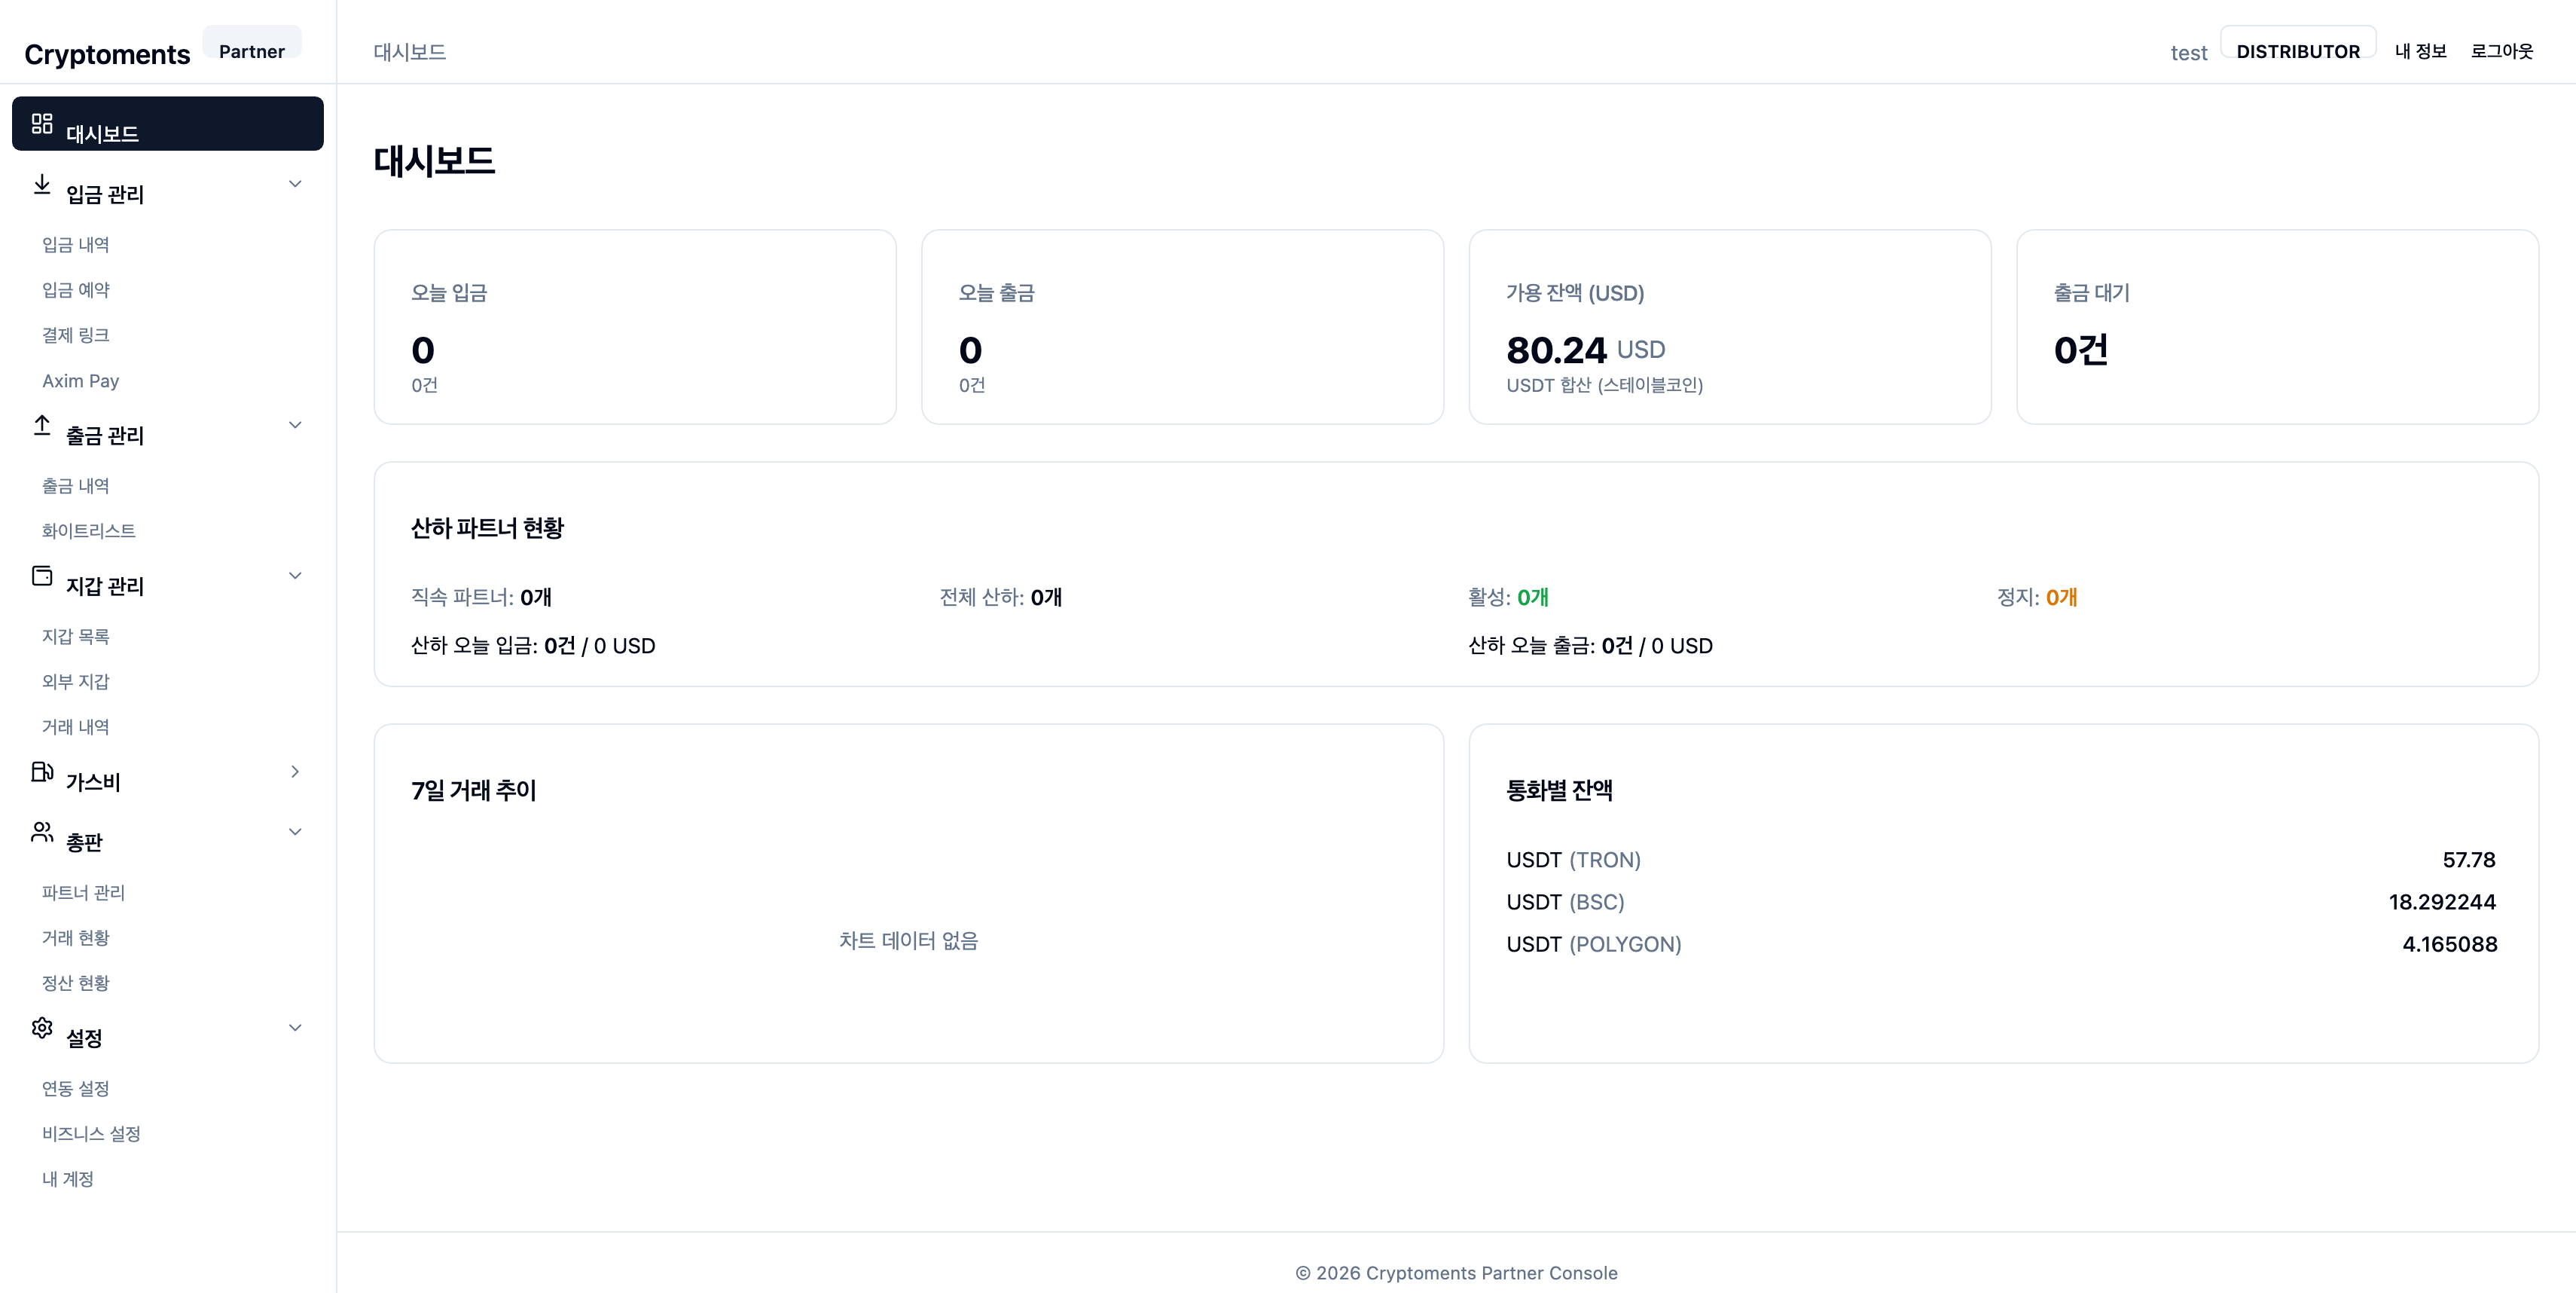
The first screen you see after signing in. Monitor today's deposit/withdrawal activity, balances, and the last 7 days of transaction trends in real time.

Dashboard
Dashboard — today's deposits/withdrawals, available balance, 7-day trend, balance by currency

Key Metric Cards

CardShowsDescription
Today's DepositsAmount + countTotal deposit amount and count for today
Today's WithdrawalsAmount + countTotal withdrawal amount and count processed today
Available BalanceUSD totalUSD-equivalent total of all stablecoin (USDT/USDC) balances
Pending WithdrawalsCountNumber of withdrawal requests awaiting approval

7-Day Trend Chart

Visualizes daily deposit amounts and counts over the last 7 days, so you can spot volume trends quickly.

Balance by Currency

Shows held balances by currency (USDT, USDC, etc.) with network breakdown.

4 Deposit Management

Deposit history, deposit reservations, payment links, and related features.

4.1 Deposit History

Deposits Deposit History

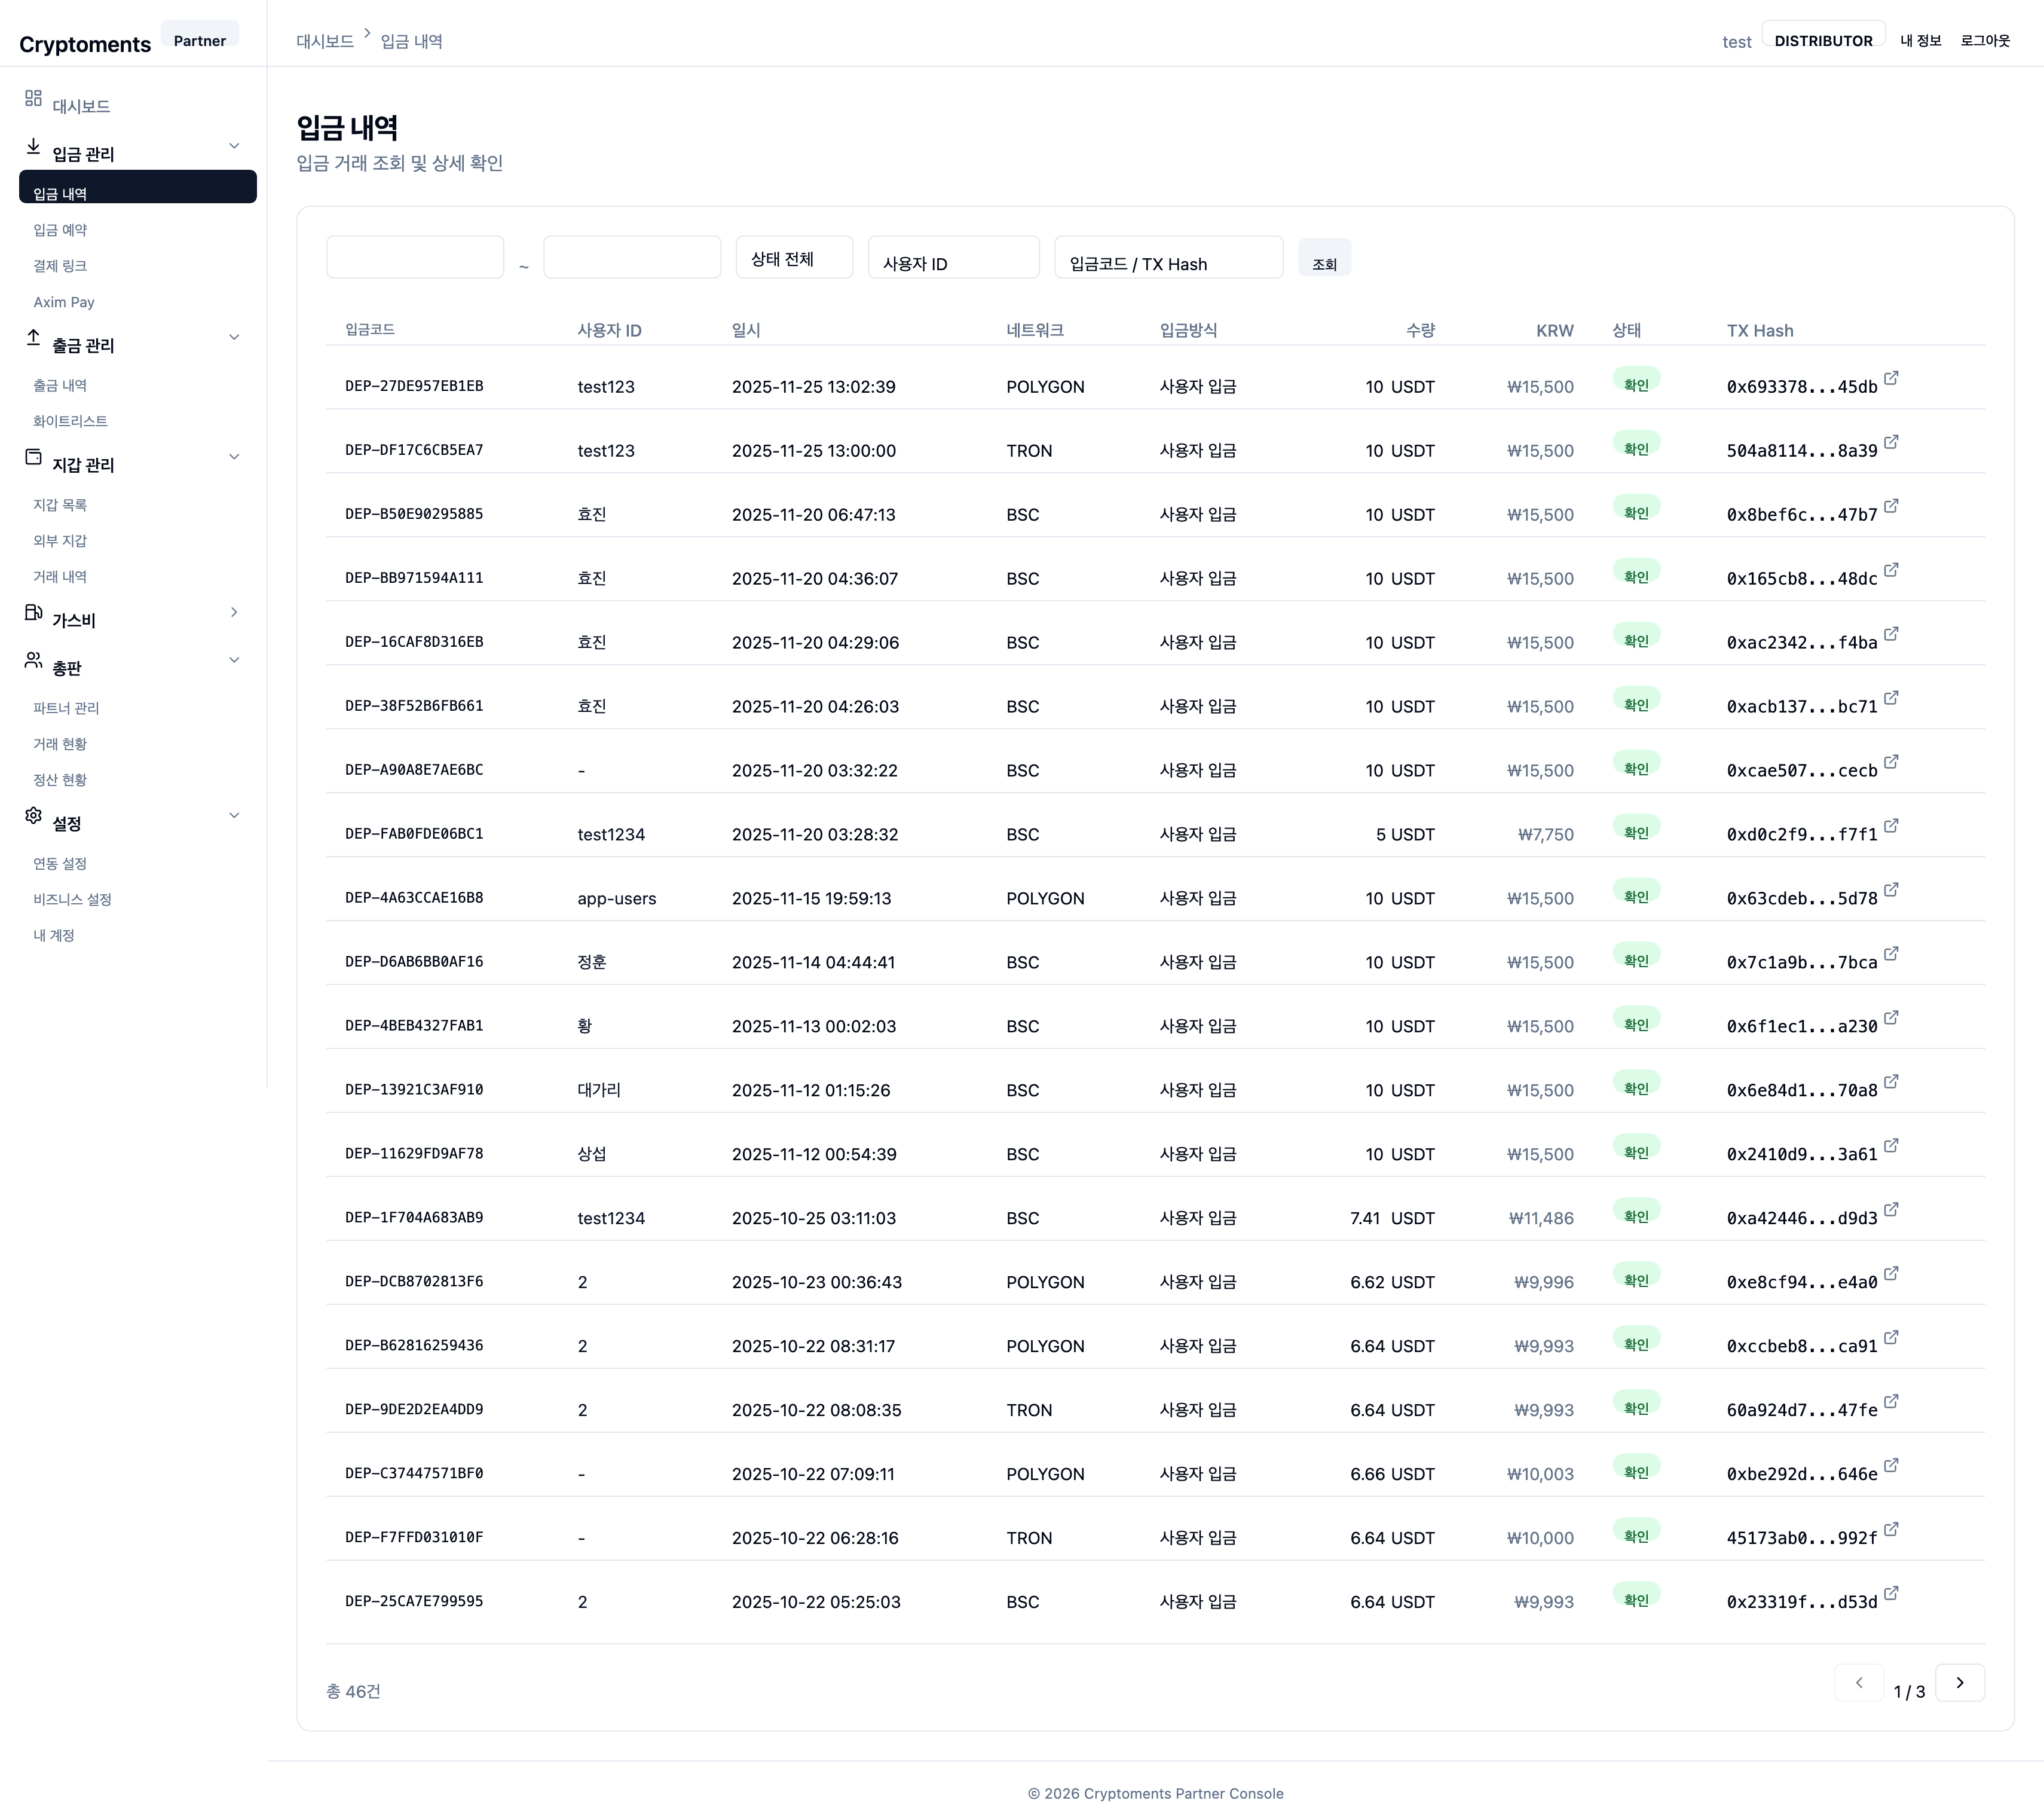
Browse and search every deposit received by the system.

Deposit history
Deposit history — search by date range, status, user ID, deposit code or TX hash

Search Filters

  • Date range — Start and end date
  • Status — DETECTED, CONFIRMING, CONFIRMED, COLLECTING, SETTLED, FAILED
  • User ID — Search by partner-side user ID
  • Deposit code / TX Hash — Search by deposit code or transaction hash

List Columns

ColumnDescription
Deposit codeUnique deposit identifier assigned by the system
User IDPartner-side user ID (click to open user detail)
TimeWhen the deposit was detected
NetworkBlockchain network (BSC, Polygon, TRON)
MethodHD wallet / external wallet / decimal match
AmountDeposit amount + token symbol + KRW value
StatusCurrent processing status (color badge)
TX HashTransaction hash (click to open block explorer)
💡
Detail panel: Click a row to open the detail panel on the right with deposit code, fee, net amount, confirmation time, and more.

4.2 Deposit Reservations

Deposits Deposit Reservations

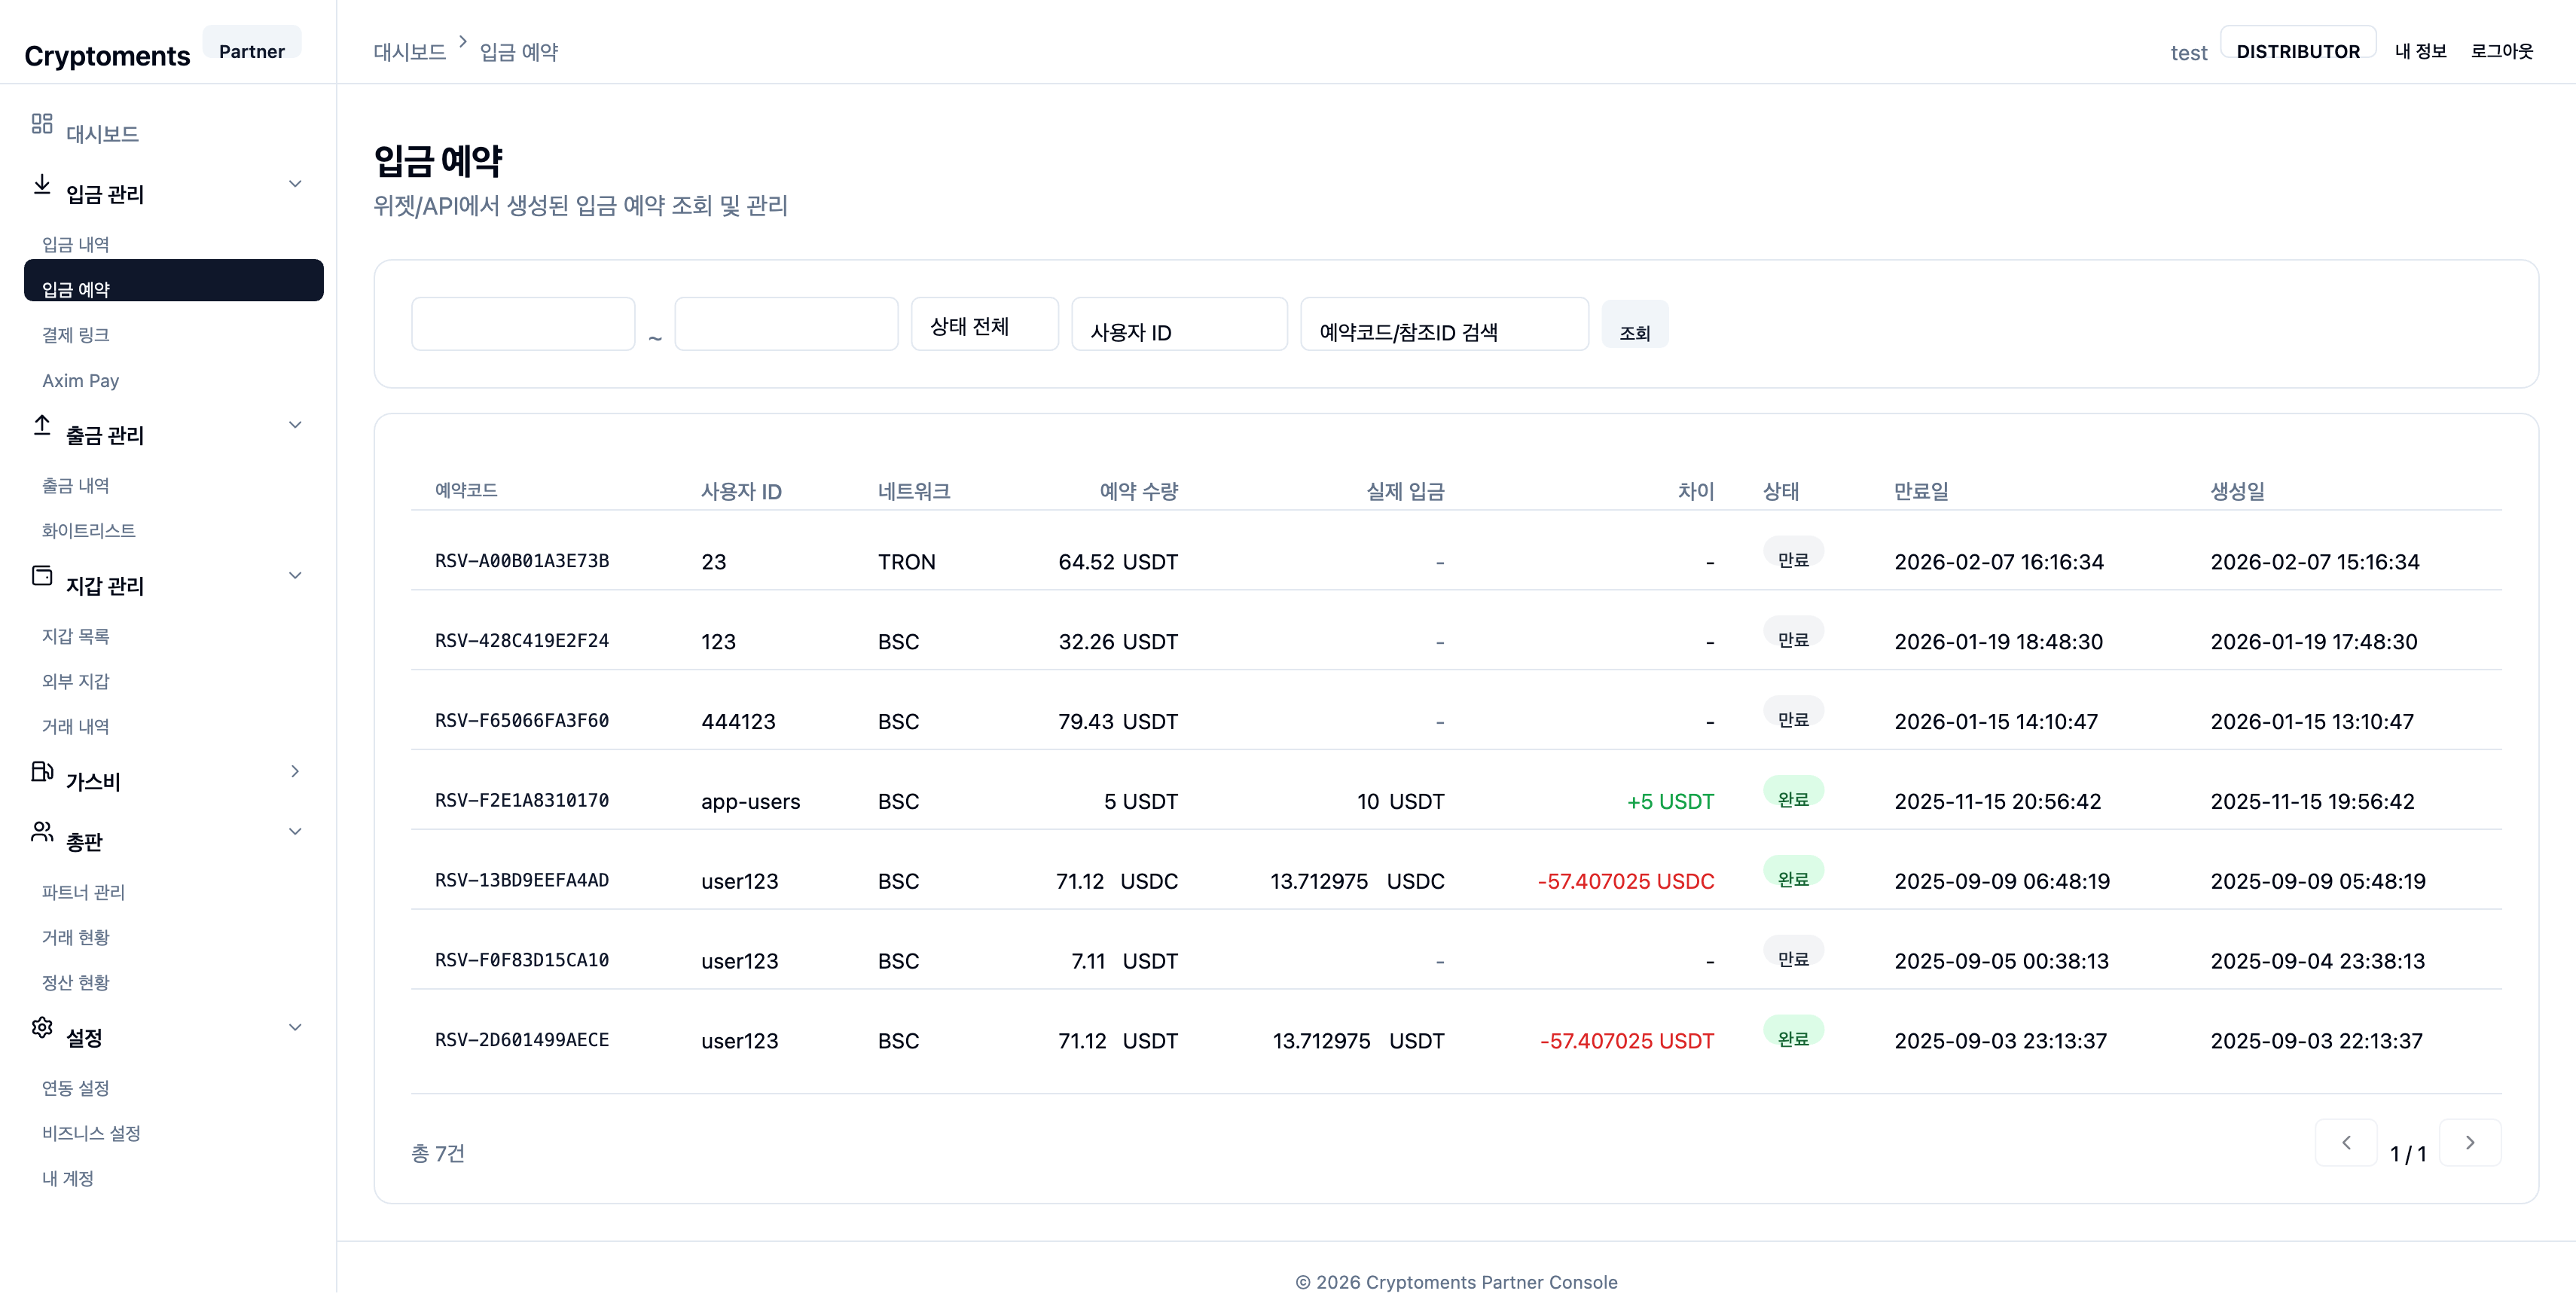
Reserve a fixed deposit address for a user so incoming deposits are matched to them automatically.

Deposit reservations
💡
When to use it:
When you want to pre-assign a dedicated deposit address to a specific user. Reservations can also be created via API.

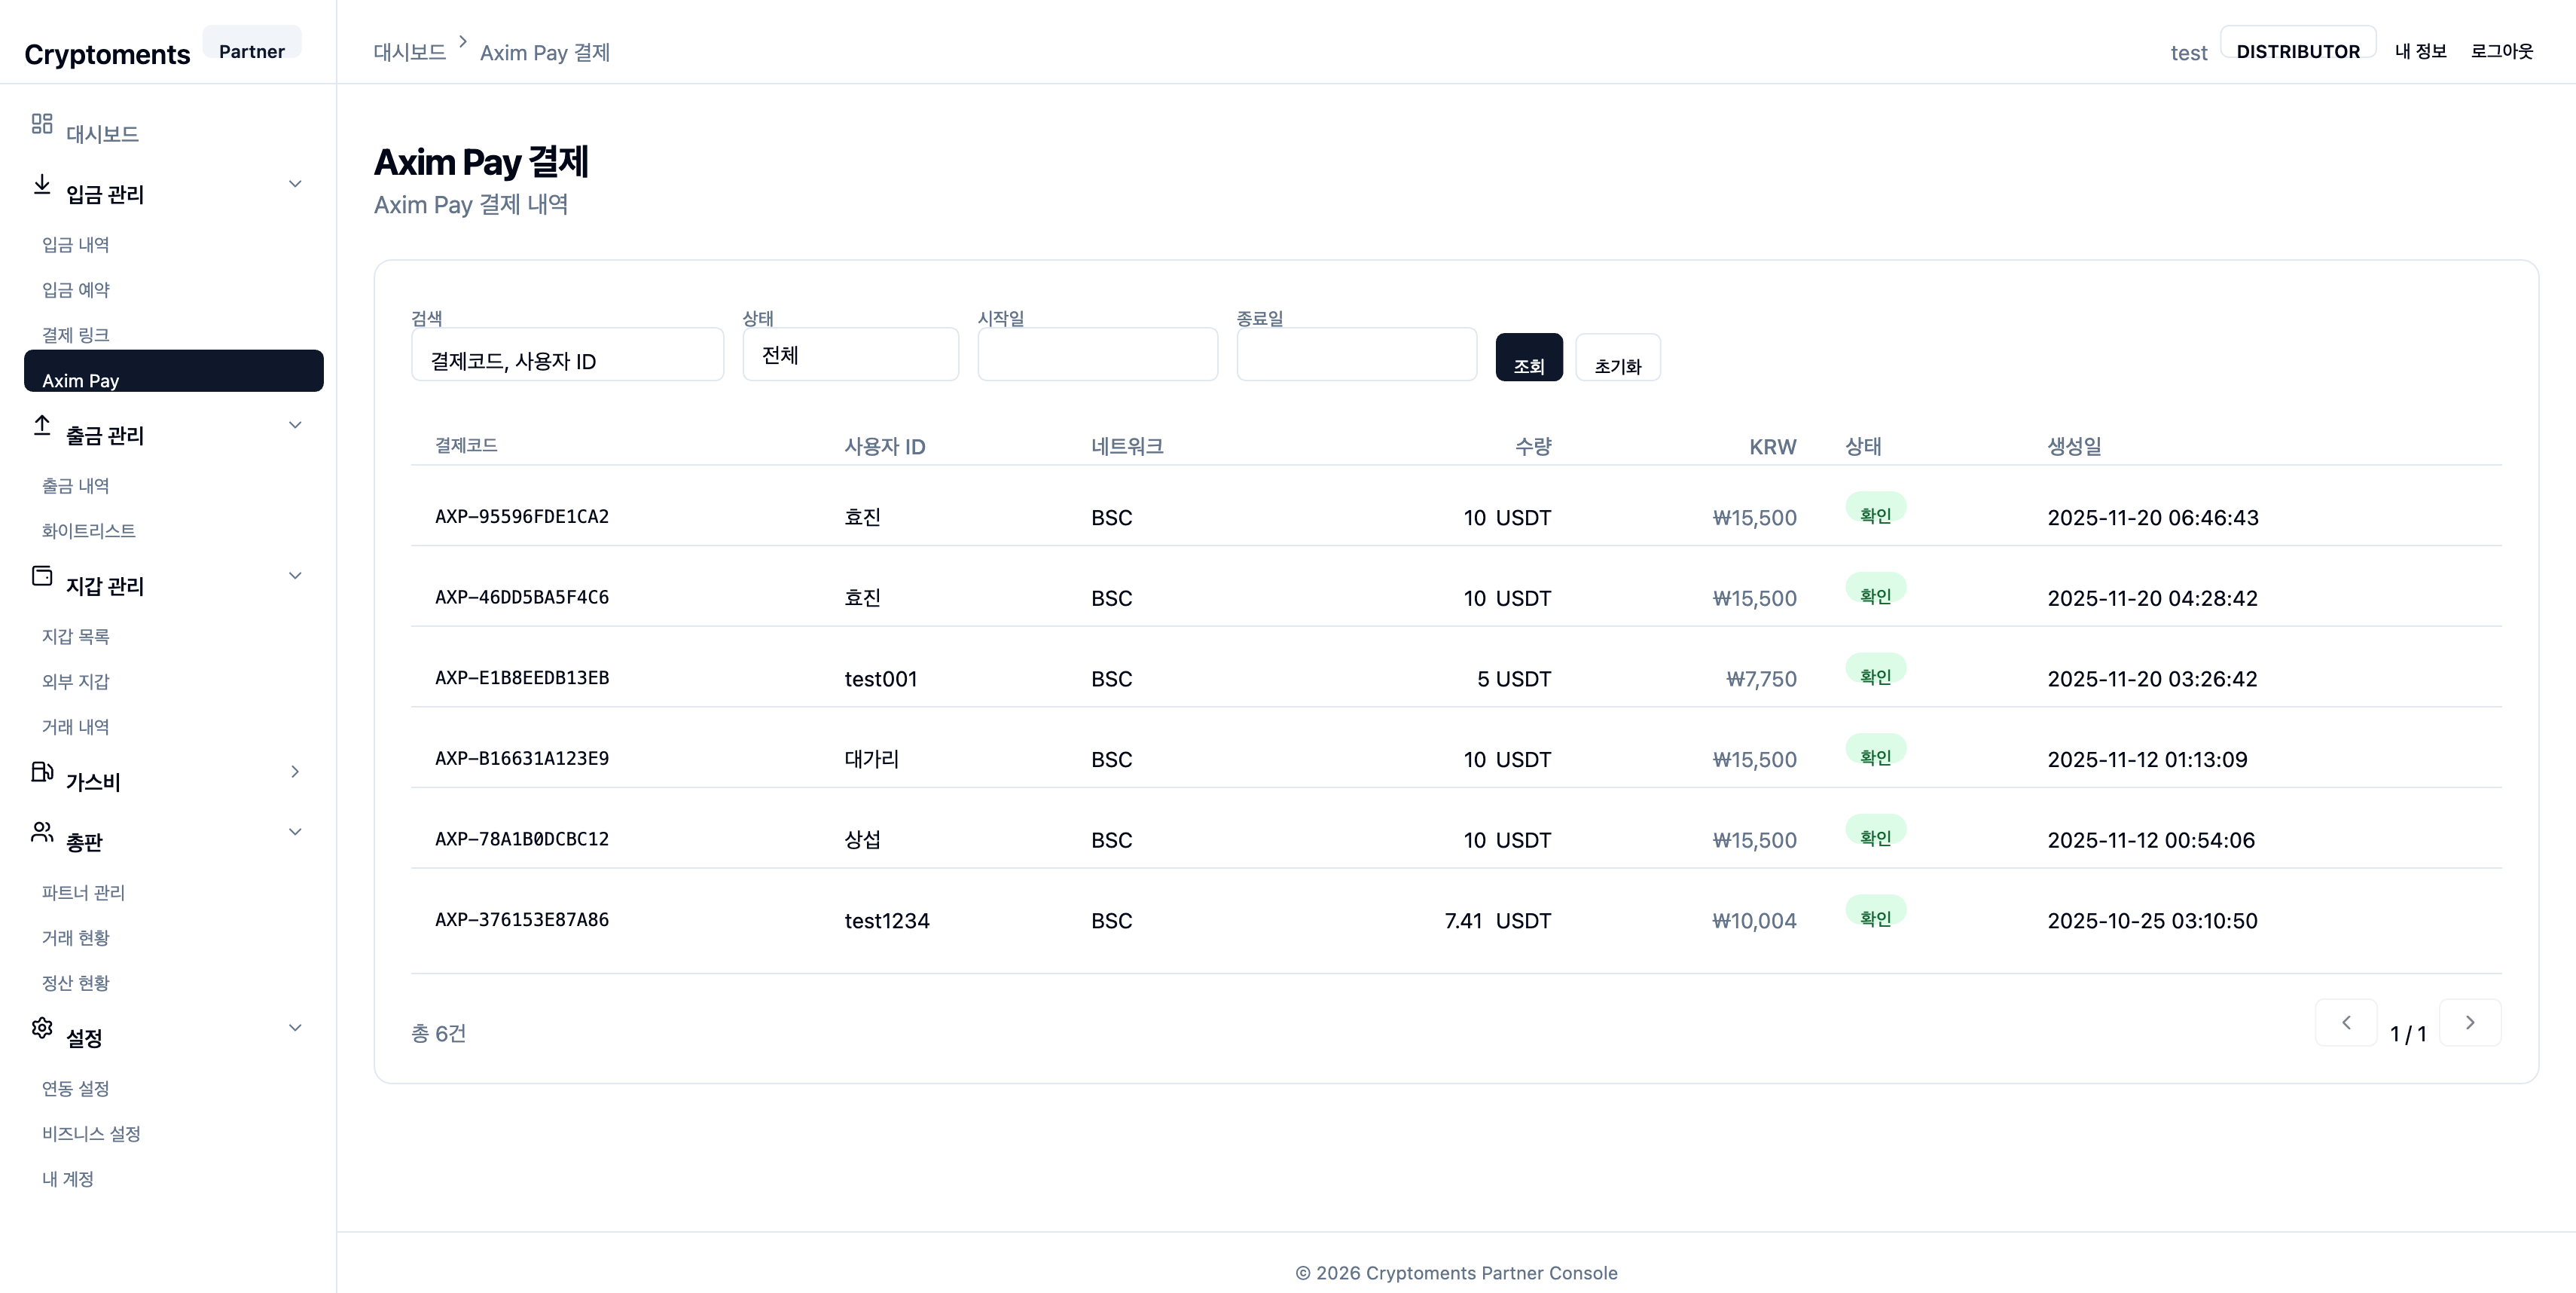
4.4 Axim Pay

Deposits Axim Pay

Browse payments processed through the Axim Pay integration. Only visible to partners with Axim Pay enabled.

Axim Pay

5 Withdrawal Management

Withdrawal history, withdrawal requests, and whitelist management.

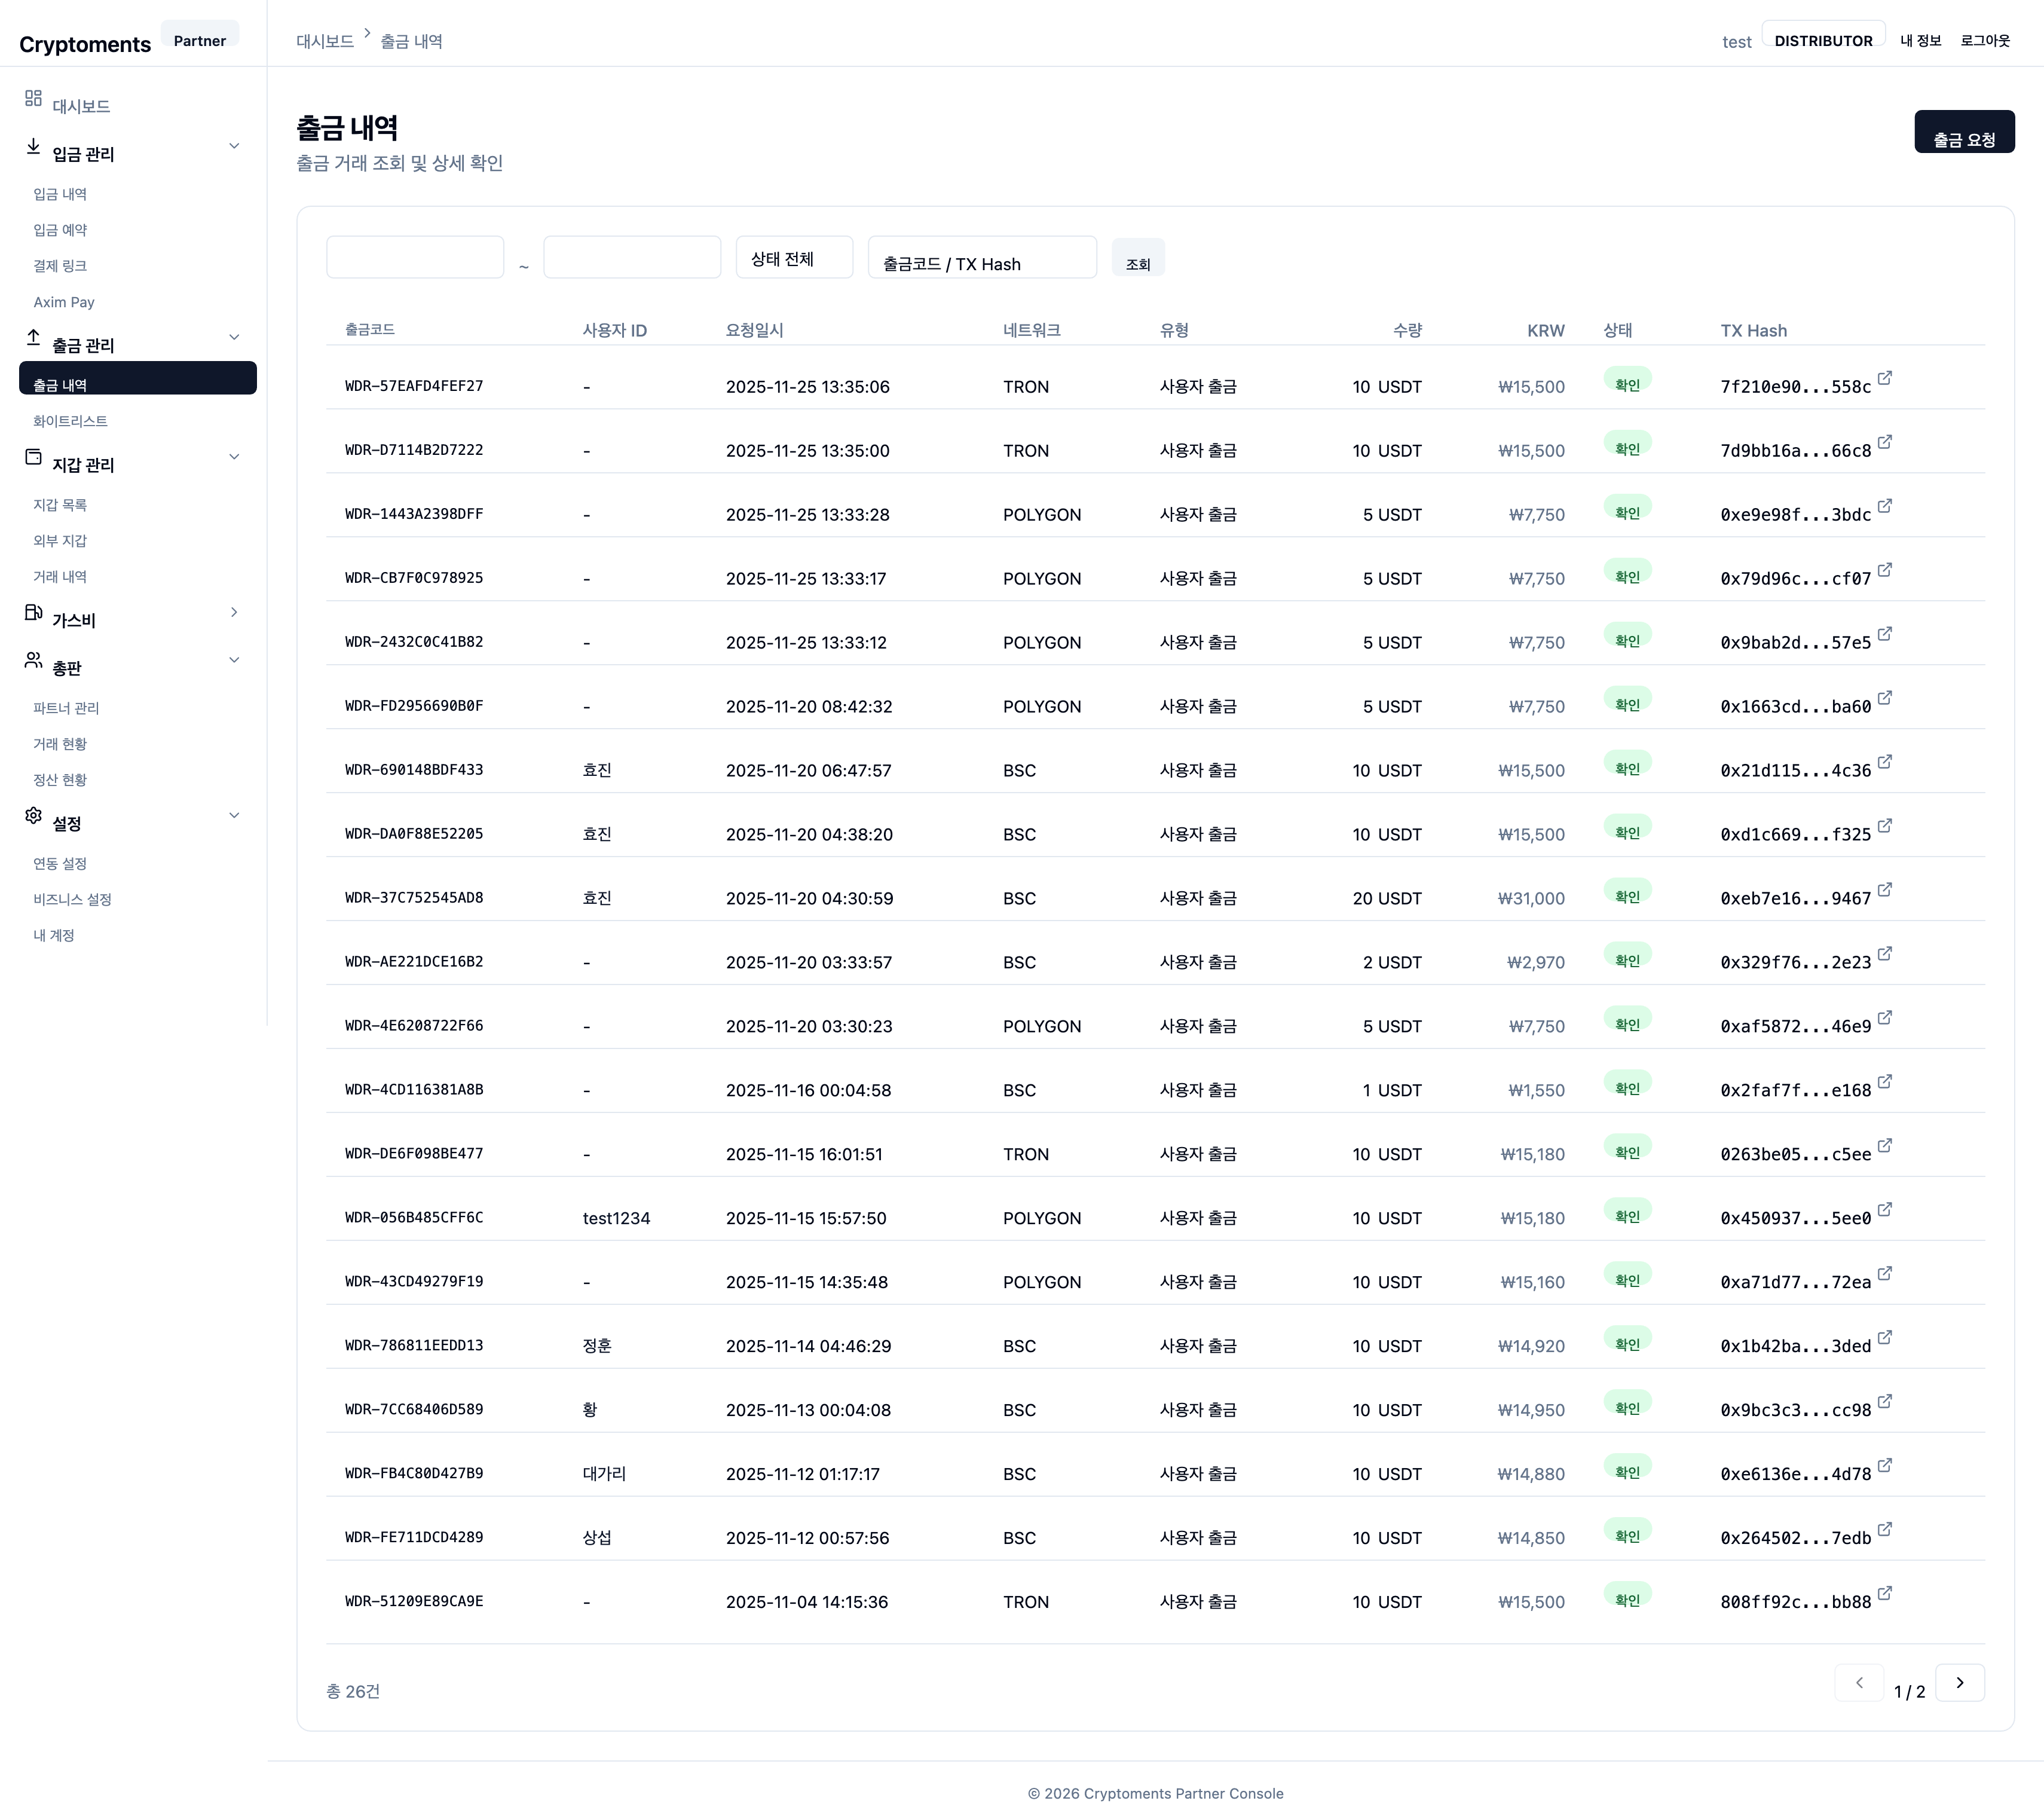
5.1 Withdrawal History

Withdrawals Withdrawal History

Browse all withdrawal transactions and handle requests, approvals, and rejections.

Withdrawal history
Withdrawal history — search by date range, status, withdrawal code or TX hash; create a withdrawal request

Search Filters

  • Date range — Start and end date
  • Status — REQUESTED, PENDING_APPROVAL, APPROVED, PROCESSING, CONFIRMED, FAILED, CANCELLED, REJECTED
  • Withdrawal code / TX Hash — Search by withdrawal code or transaction hash

List Columns

ColumnDescription
Withdrawal codeUnique withdrawal identifier assigned by the system
User IDPartner-side user ID
Requested atWhen the withdrawal was requested
NetworkBlockchain network
TypeUser withdrawal / API withdrawal / Manual
AmountWithdrawal amount + token symbol + KRW value
StatusCurrent processing status (color badge)
TX HashTransaction hash

5.2 Requesting a Withdrawal

You can request withdrawals directly from the console.

1
Click "Request Withdrawal" on the Withdrawal History page

The withdrawal request modal opens.

2
Pick network and currency

Pick the blockchain network and token. The available balance is shown after selection.

3
Enter the amount

Enter the withdrawal amount. Click MAX to auto-fill the entire available balance.

4
Enter the recipient address

Whitelist mode: Pick from your registered whitelist addresses.
Manual mode: Enter the destination wallet address yourself.

5
OTP authentication and confirm

Enter your 2FA code to confirm the withdrawal request.

Withdrawal request
⚠️
Withdrawal Policy: Depending on your policy, withdrawals over a threshold automatically transition to a pending-approval state. An admin must explicitly approve or reject.

5.3 Approve / Reject Withdrawals

Withdrawals in PENDING_APPROVAL can be approved or rejected by an administrator.

1
Click a pending-approval row in Withdrawal History

The detail panel opens.

2
Click "Approve" or "Reject"

On reject, enter a reason.

3
OTP authentication

Enter the OTP code to confirm the approval or rejection.

💡
Cancel withdrawal: Withdrawals not yet broadcast to chain (REQUESTED, PENDING_APPROVAL, APPROVED, FAILED) can be cancelled with the "Cancel" button.

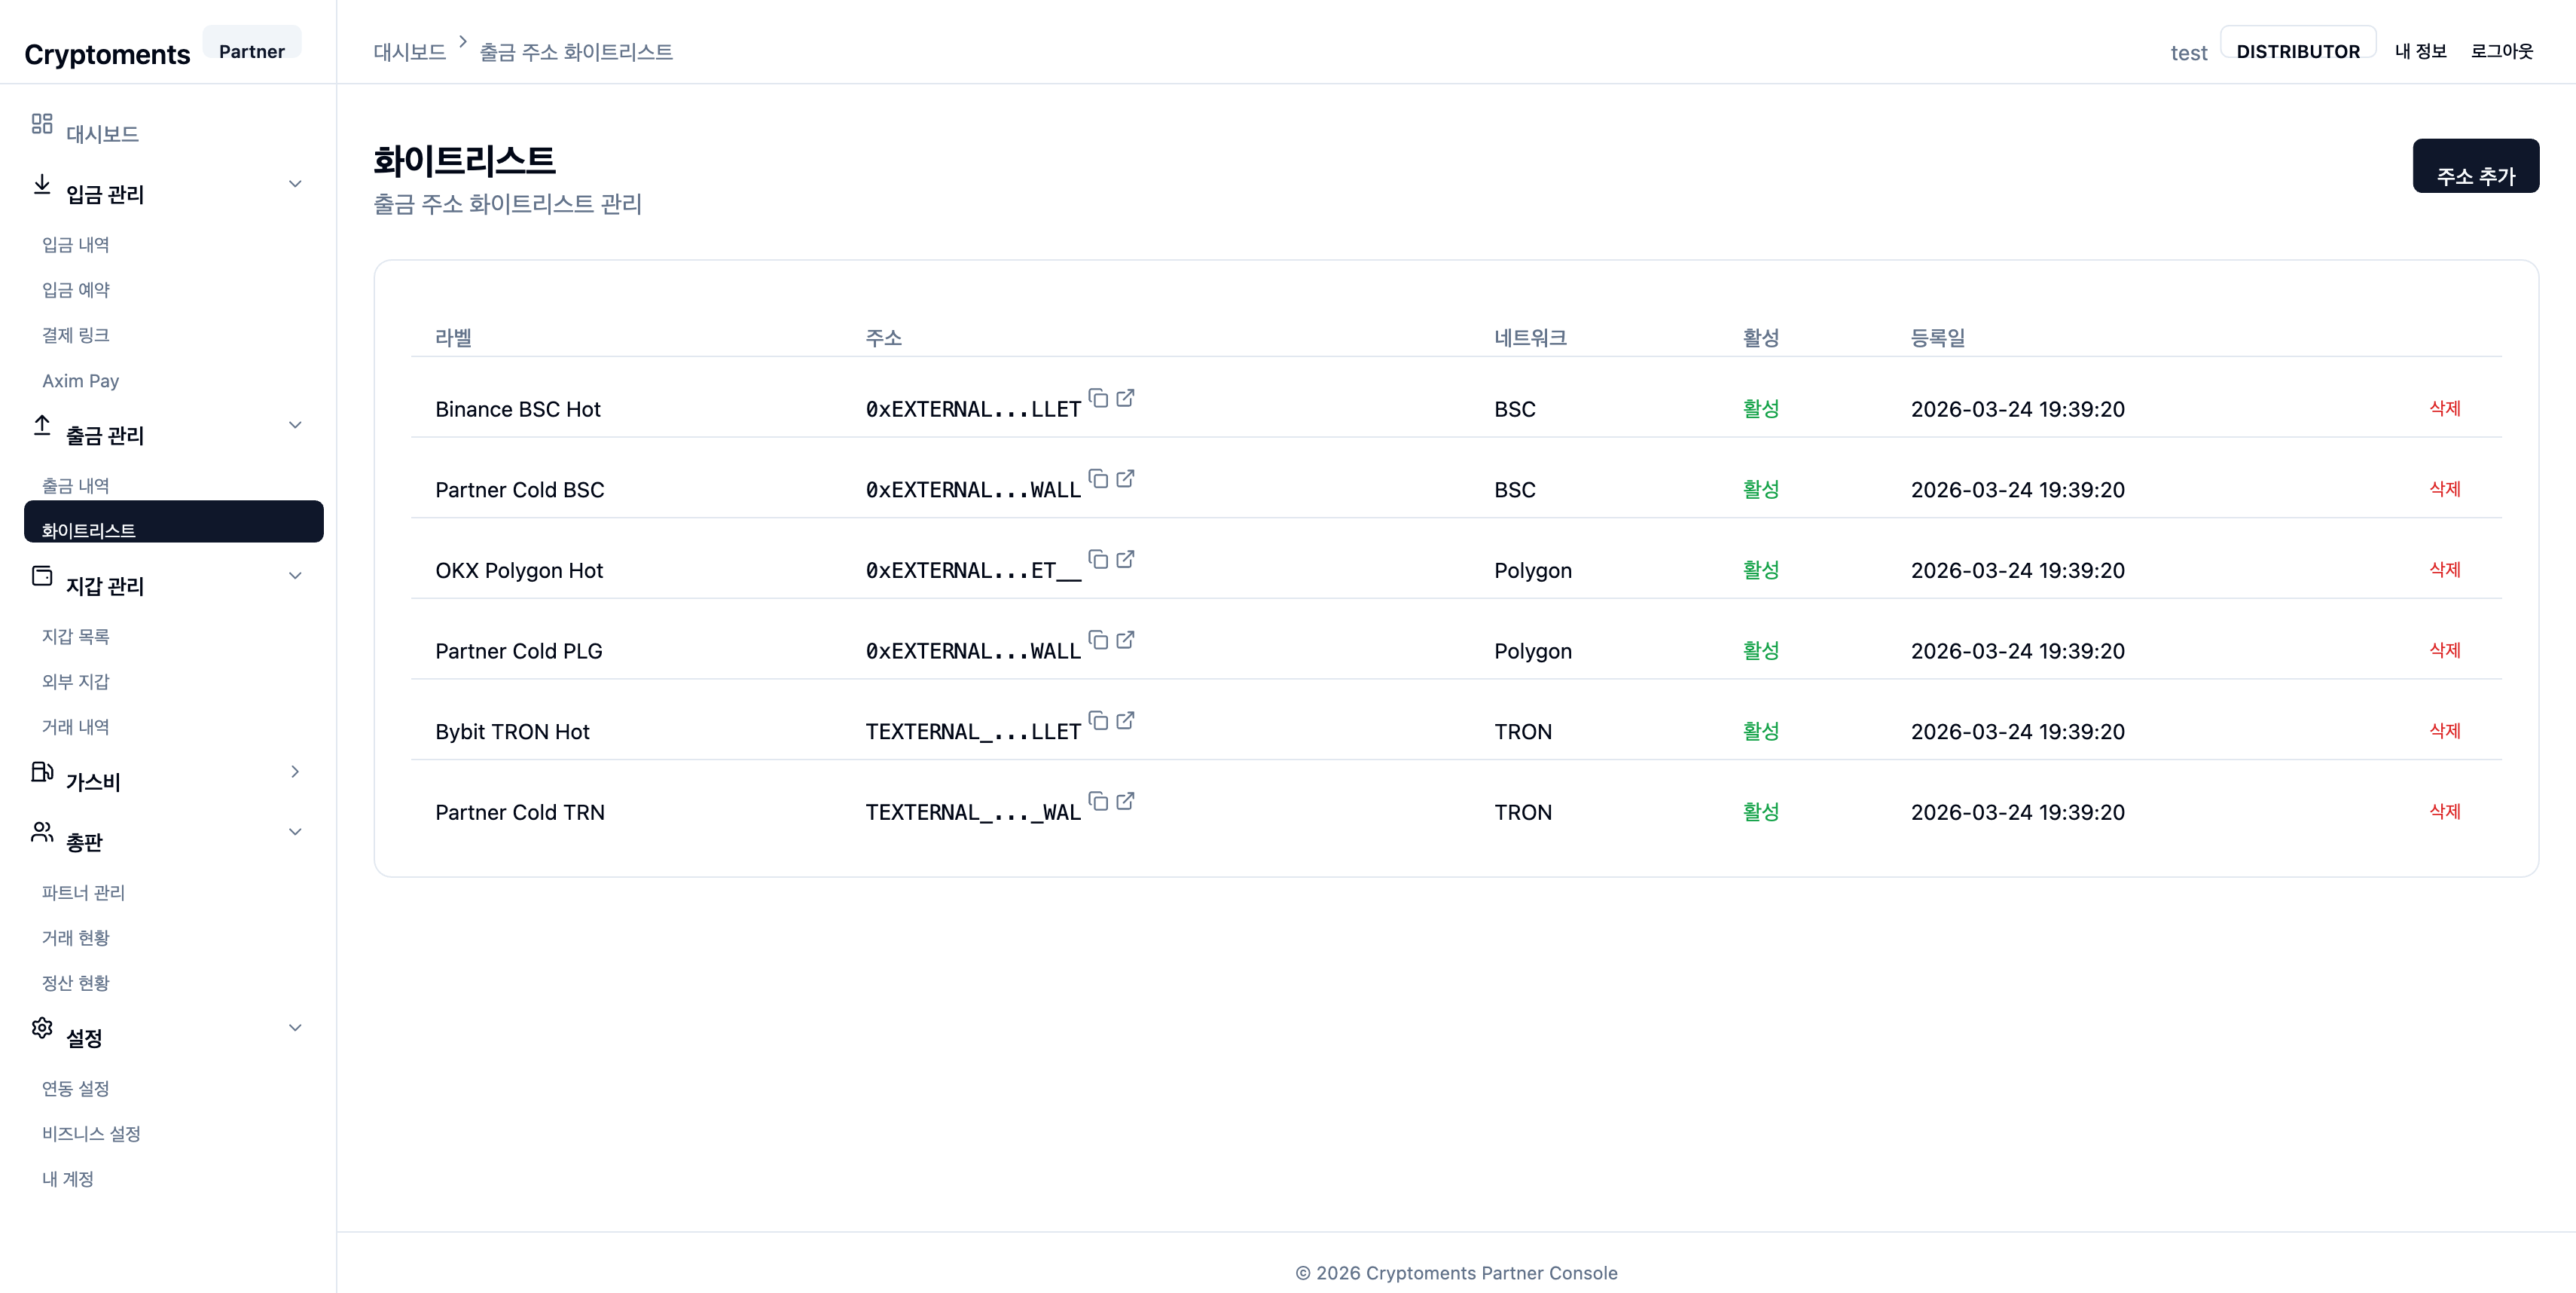
5.4 Whitelist

Withdrawals Whitelist

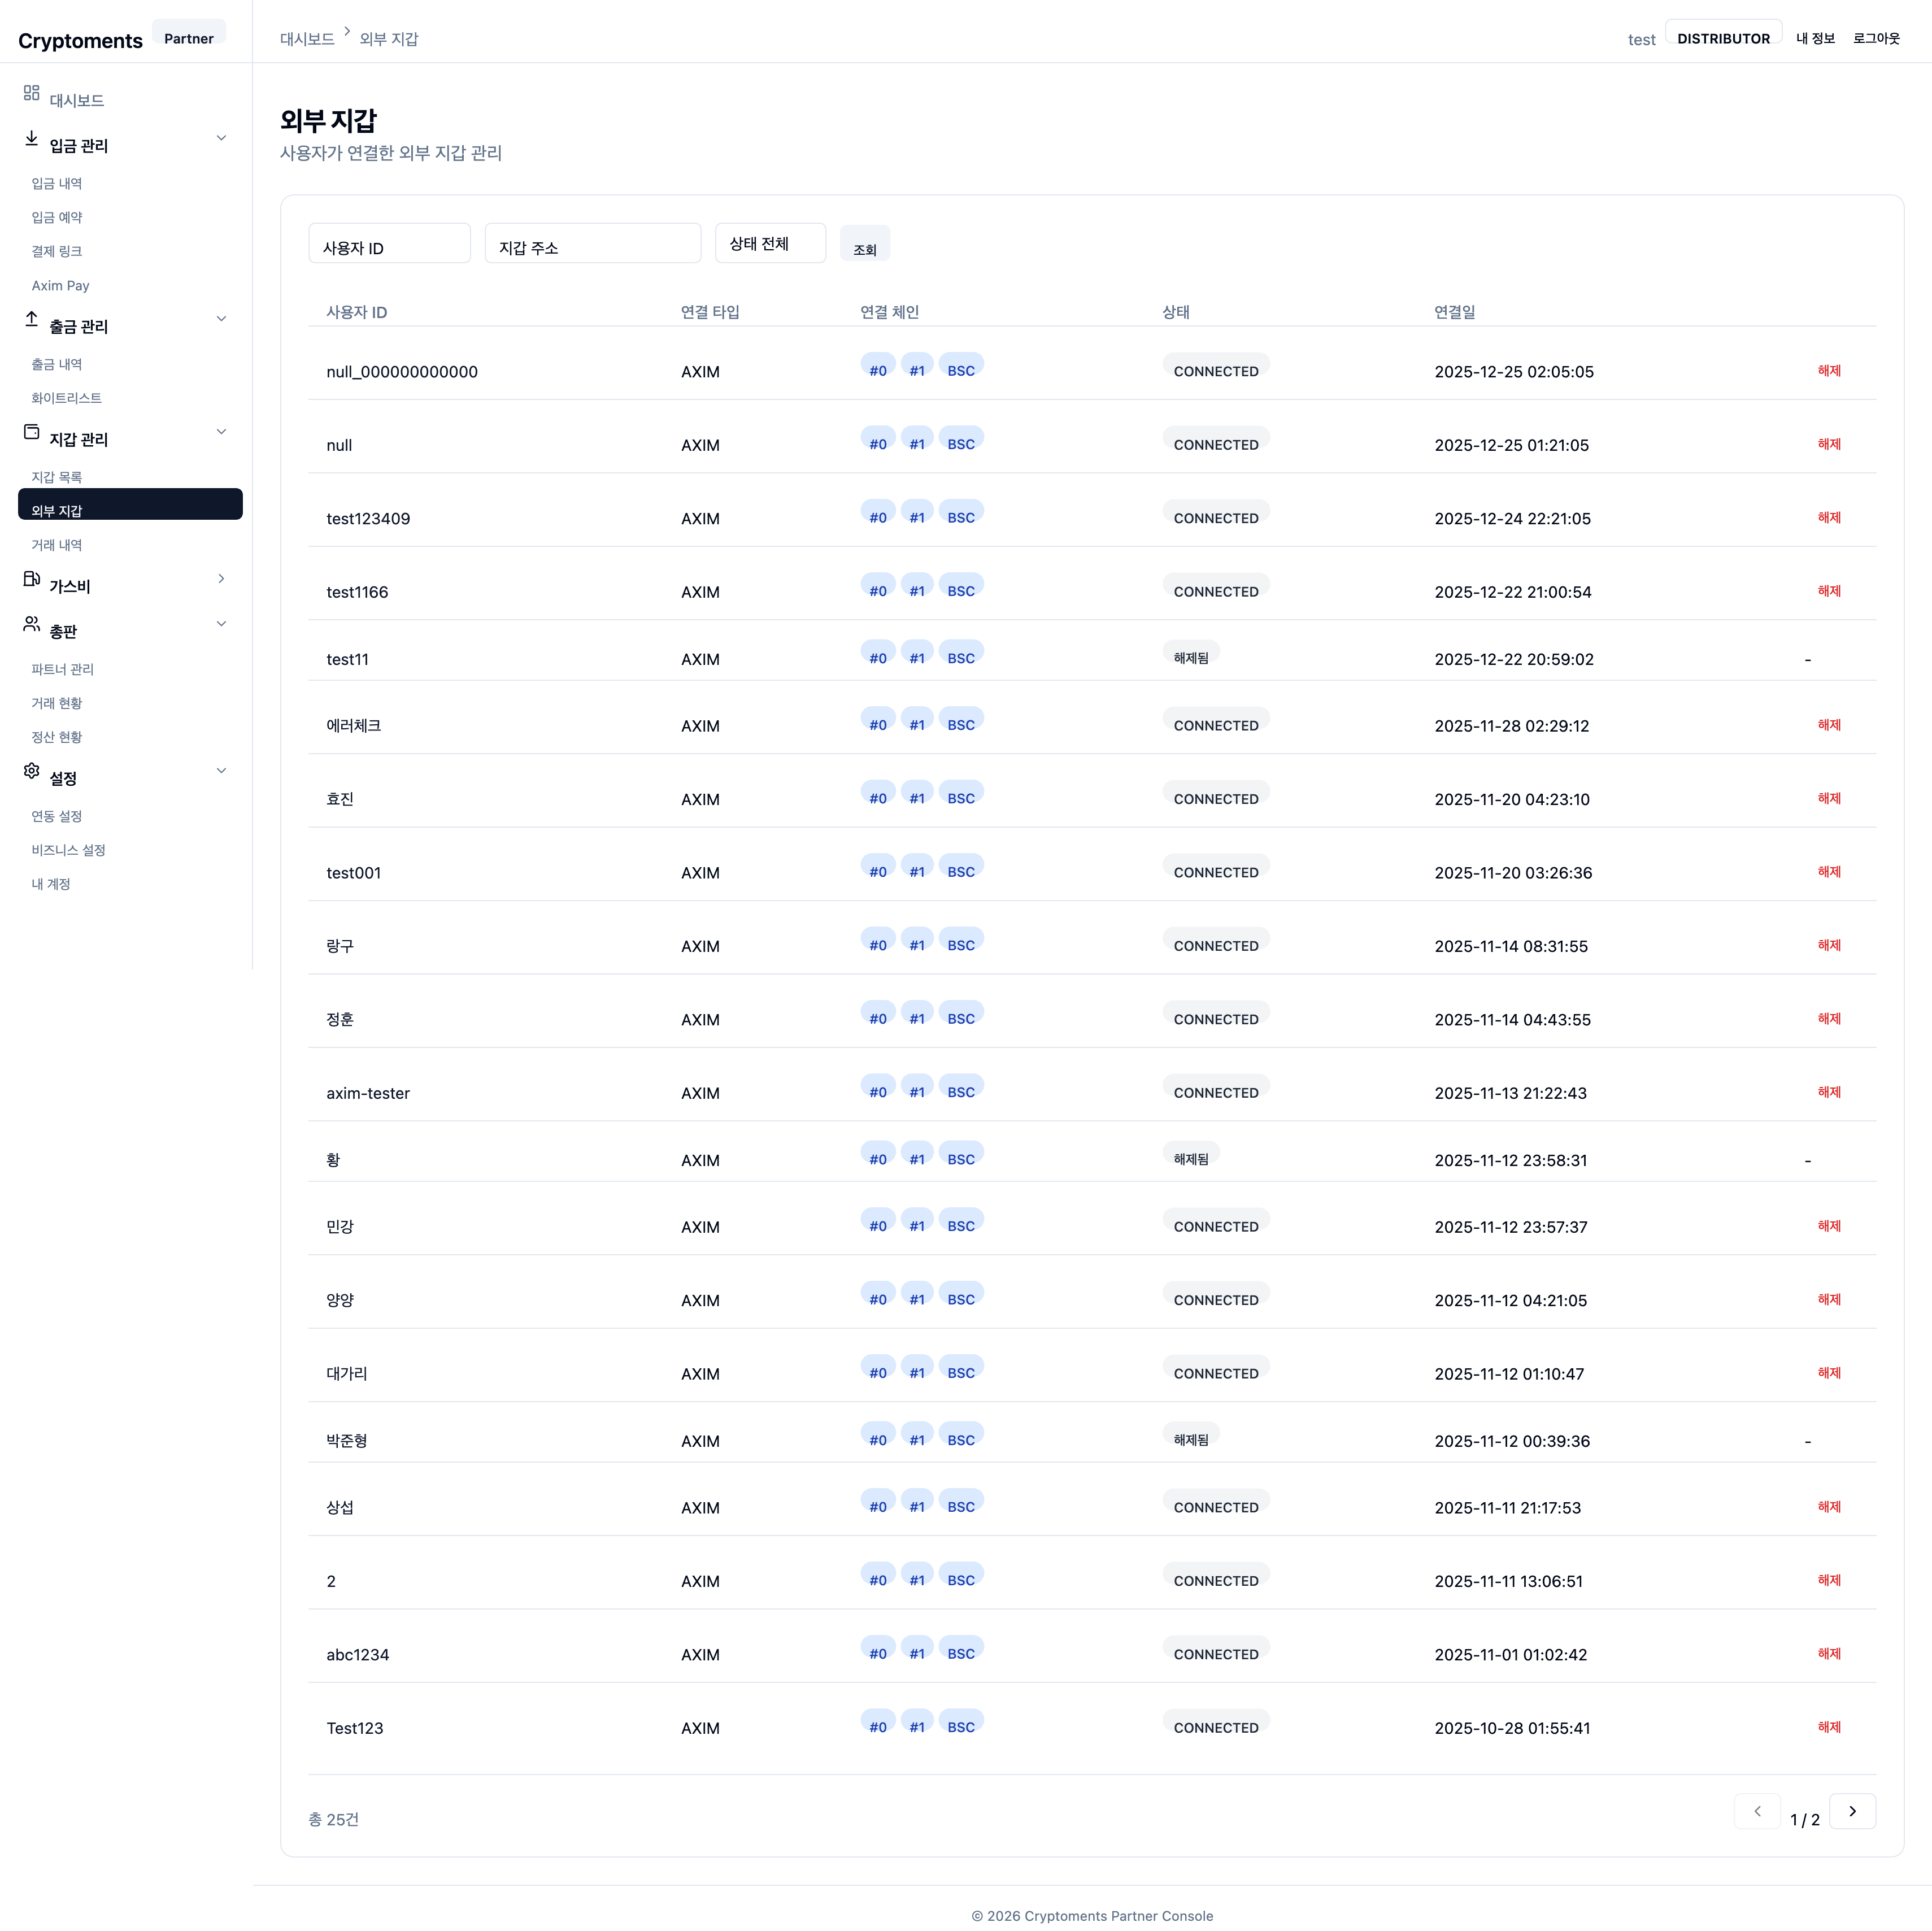
Pre-register destination addresses that can be used for withdrawals. The whitelist helps prevent withdrawals to the wrong address.

Whitelist management

6 Wallet Management

Create, browse and manage blockchain wallets.

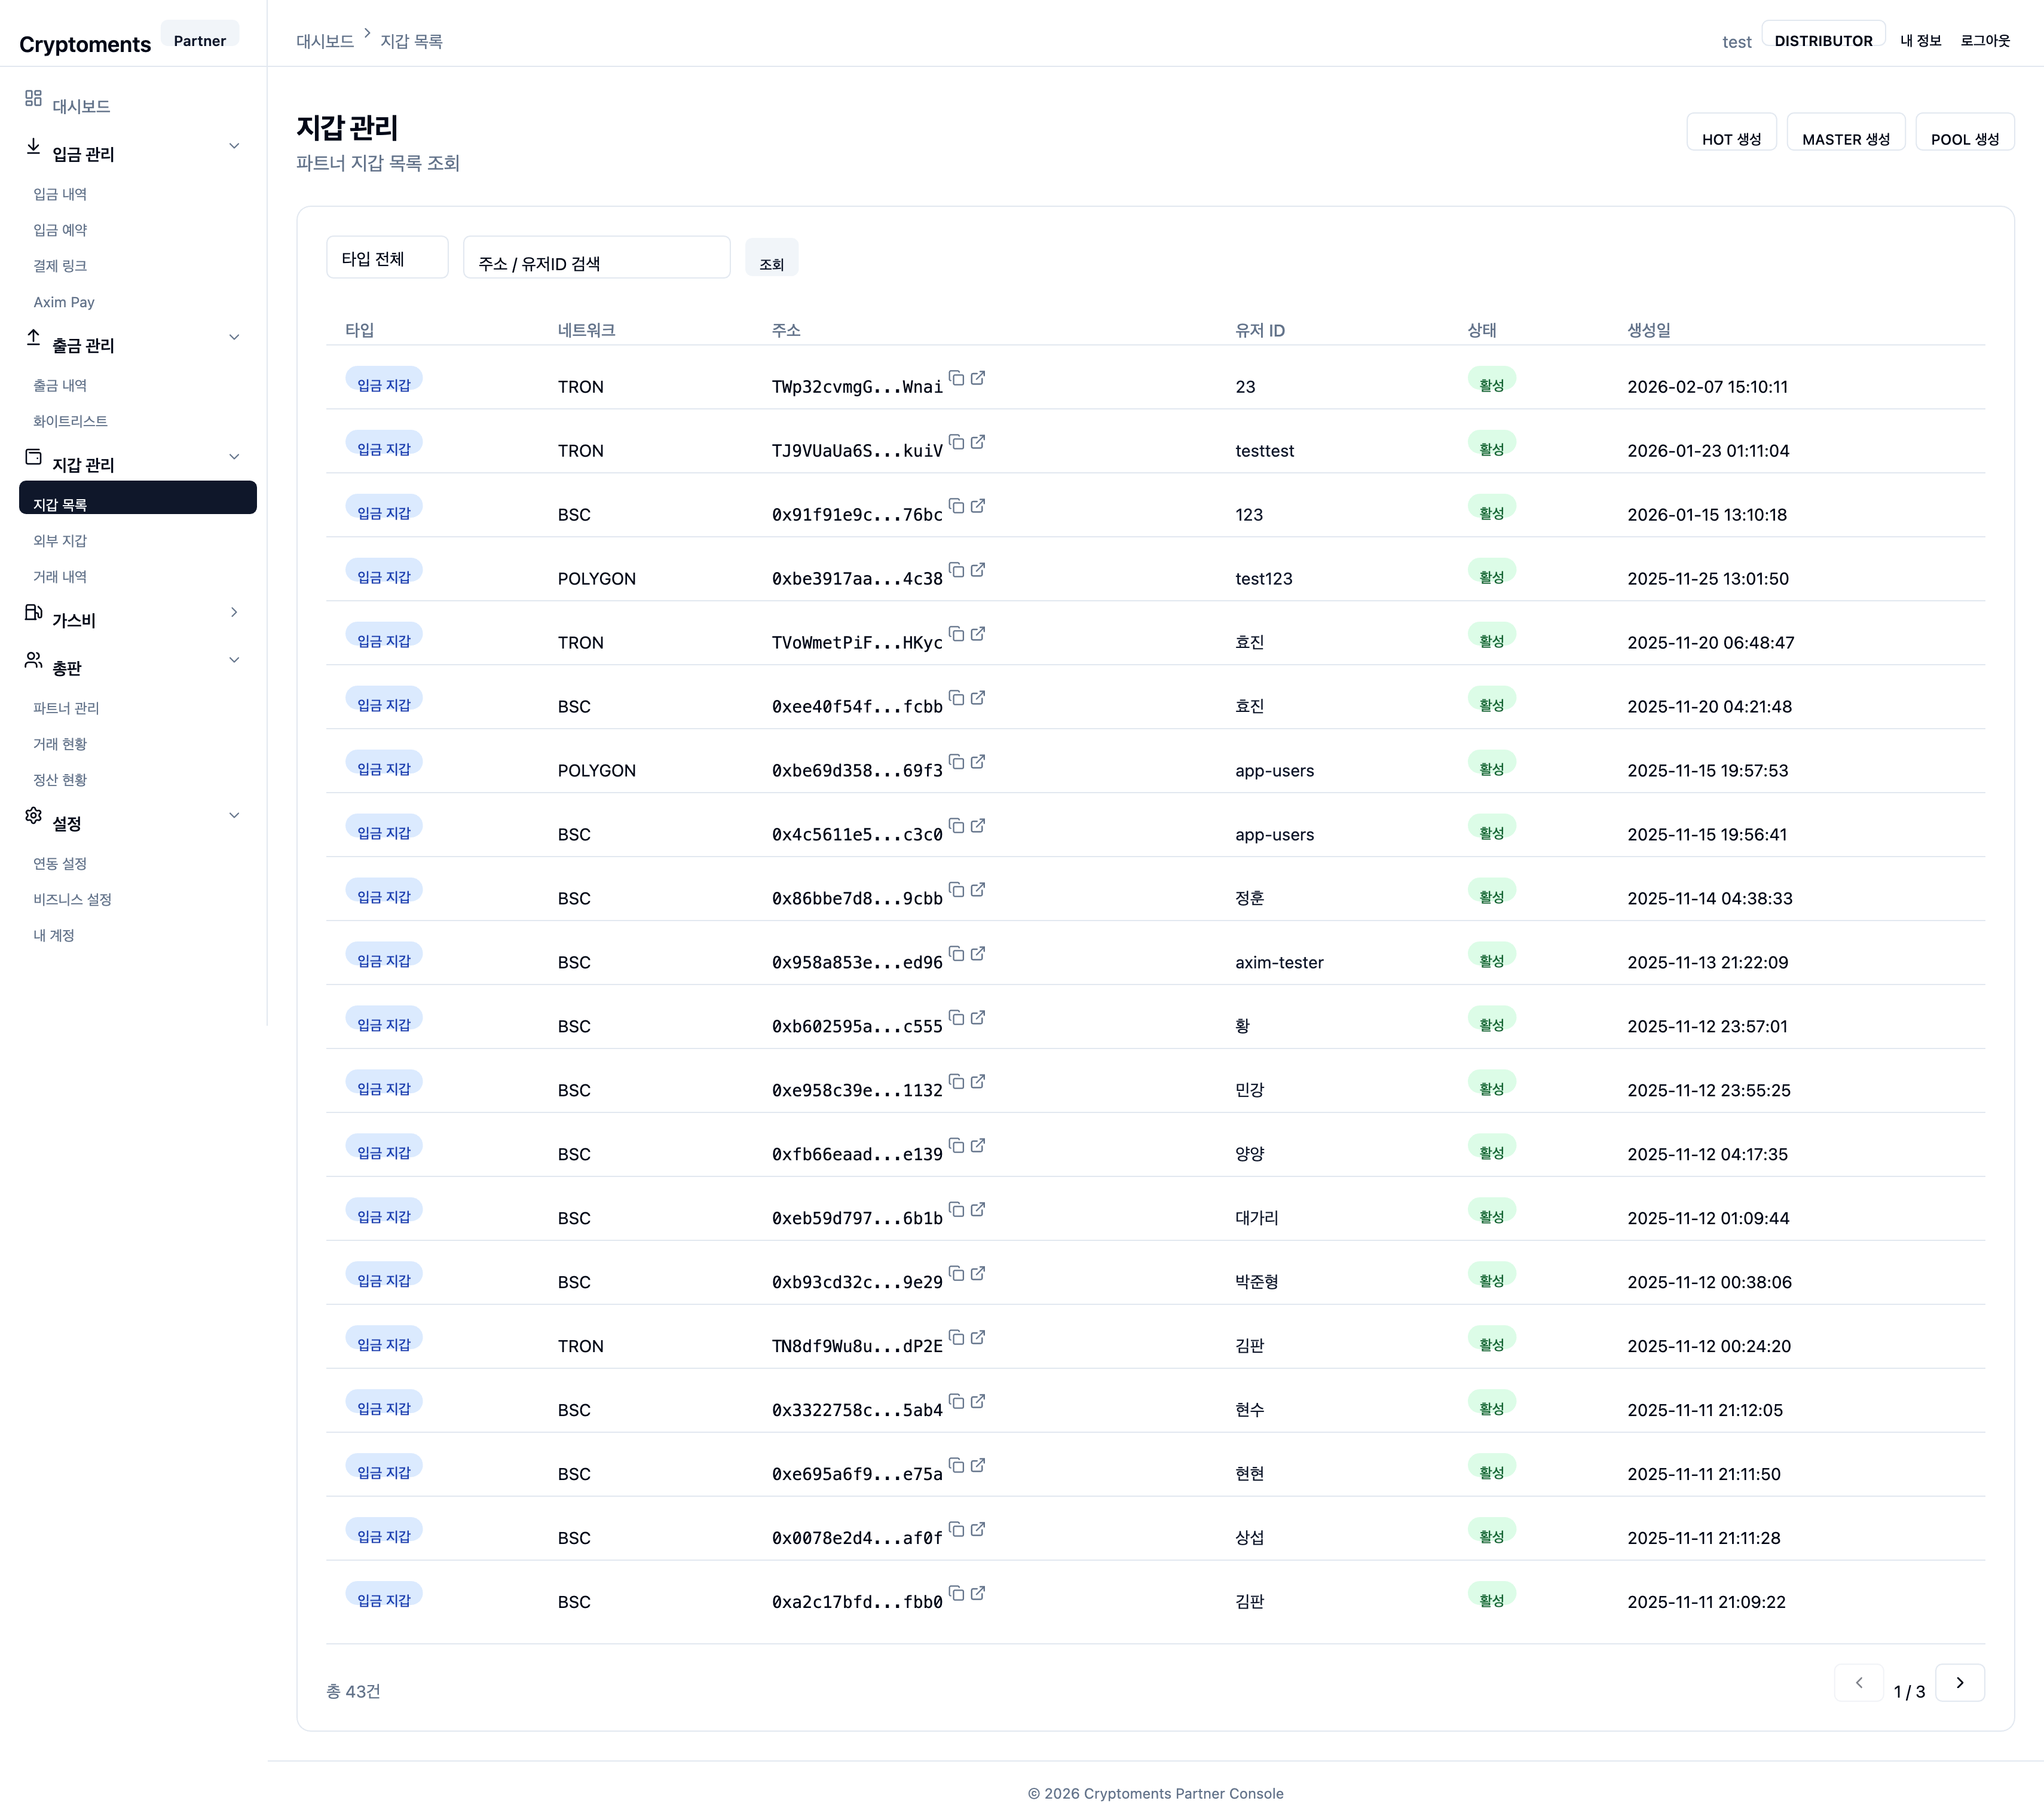
6.1 Wallet List

Wallets Wallet List

Browse all wallets registered in the system by type.

Wallet list
Wallets — list by type, with HOT/MASTER/POOL create buttons

Wallet Types

TypeRoleDescription
HOT Deposit wallet Per-user deposit wallet. Received funds are swept to the MASTER wallet during the Collection process.
MASTER Withdrawal source The partner's main treasury wallet. Withdrawals are sent from here. Created automatically when a chain is activated.
POOL Decimal matching Pool wallet used by decimal-tail matching deposits.

Create a Wallet

Use the "Create HOT", "Create MASTER", and "Create POOL" buttons at the top of the page to create a new wallet. After picking a network, the wallet address is generated automatically using HD (Hierarchical Deterministic) derivation.

💡
Wallet detail: Click a wallet in the list to open the detail page — per-token balances, deposit/withdrawal history, Approve status, and more.

6.2 External Wallets

Wallets External Wallets

Register addresses outside the system to leverage for deposit detection. Transactions sent from a registered external wallet are automatically attributed to the user as a deposit.

External wallets

6.3 Transactions

Wallets Transactions

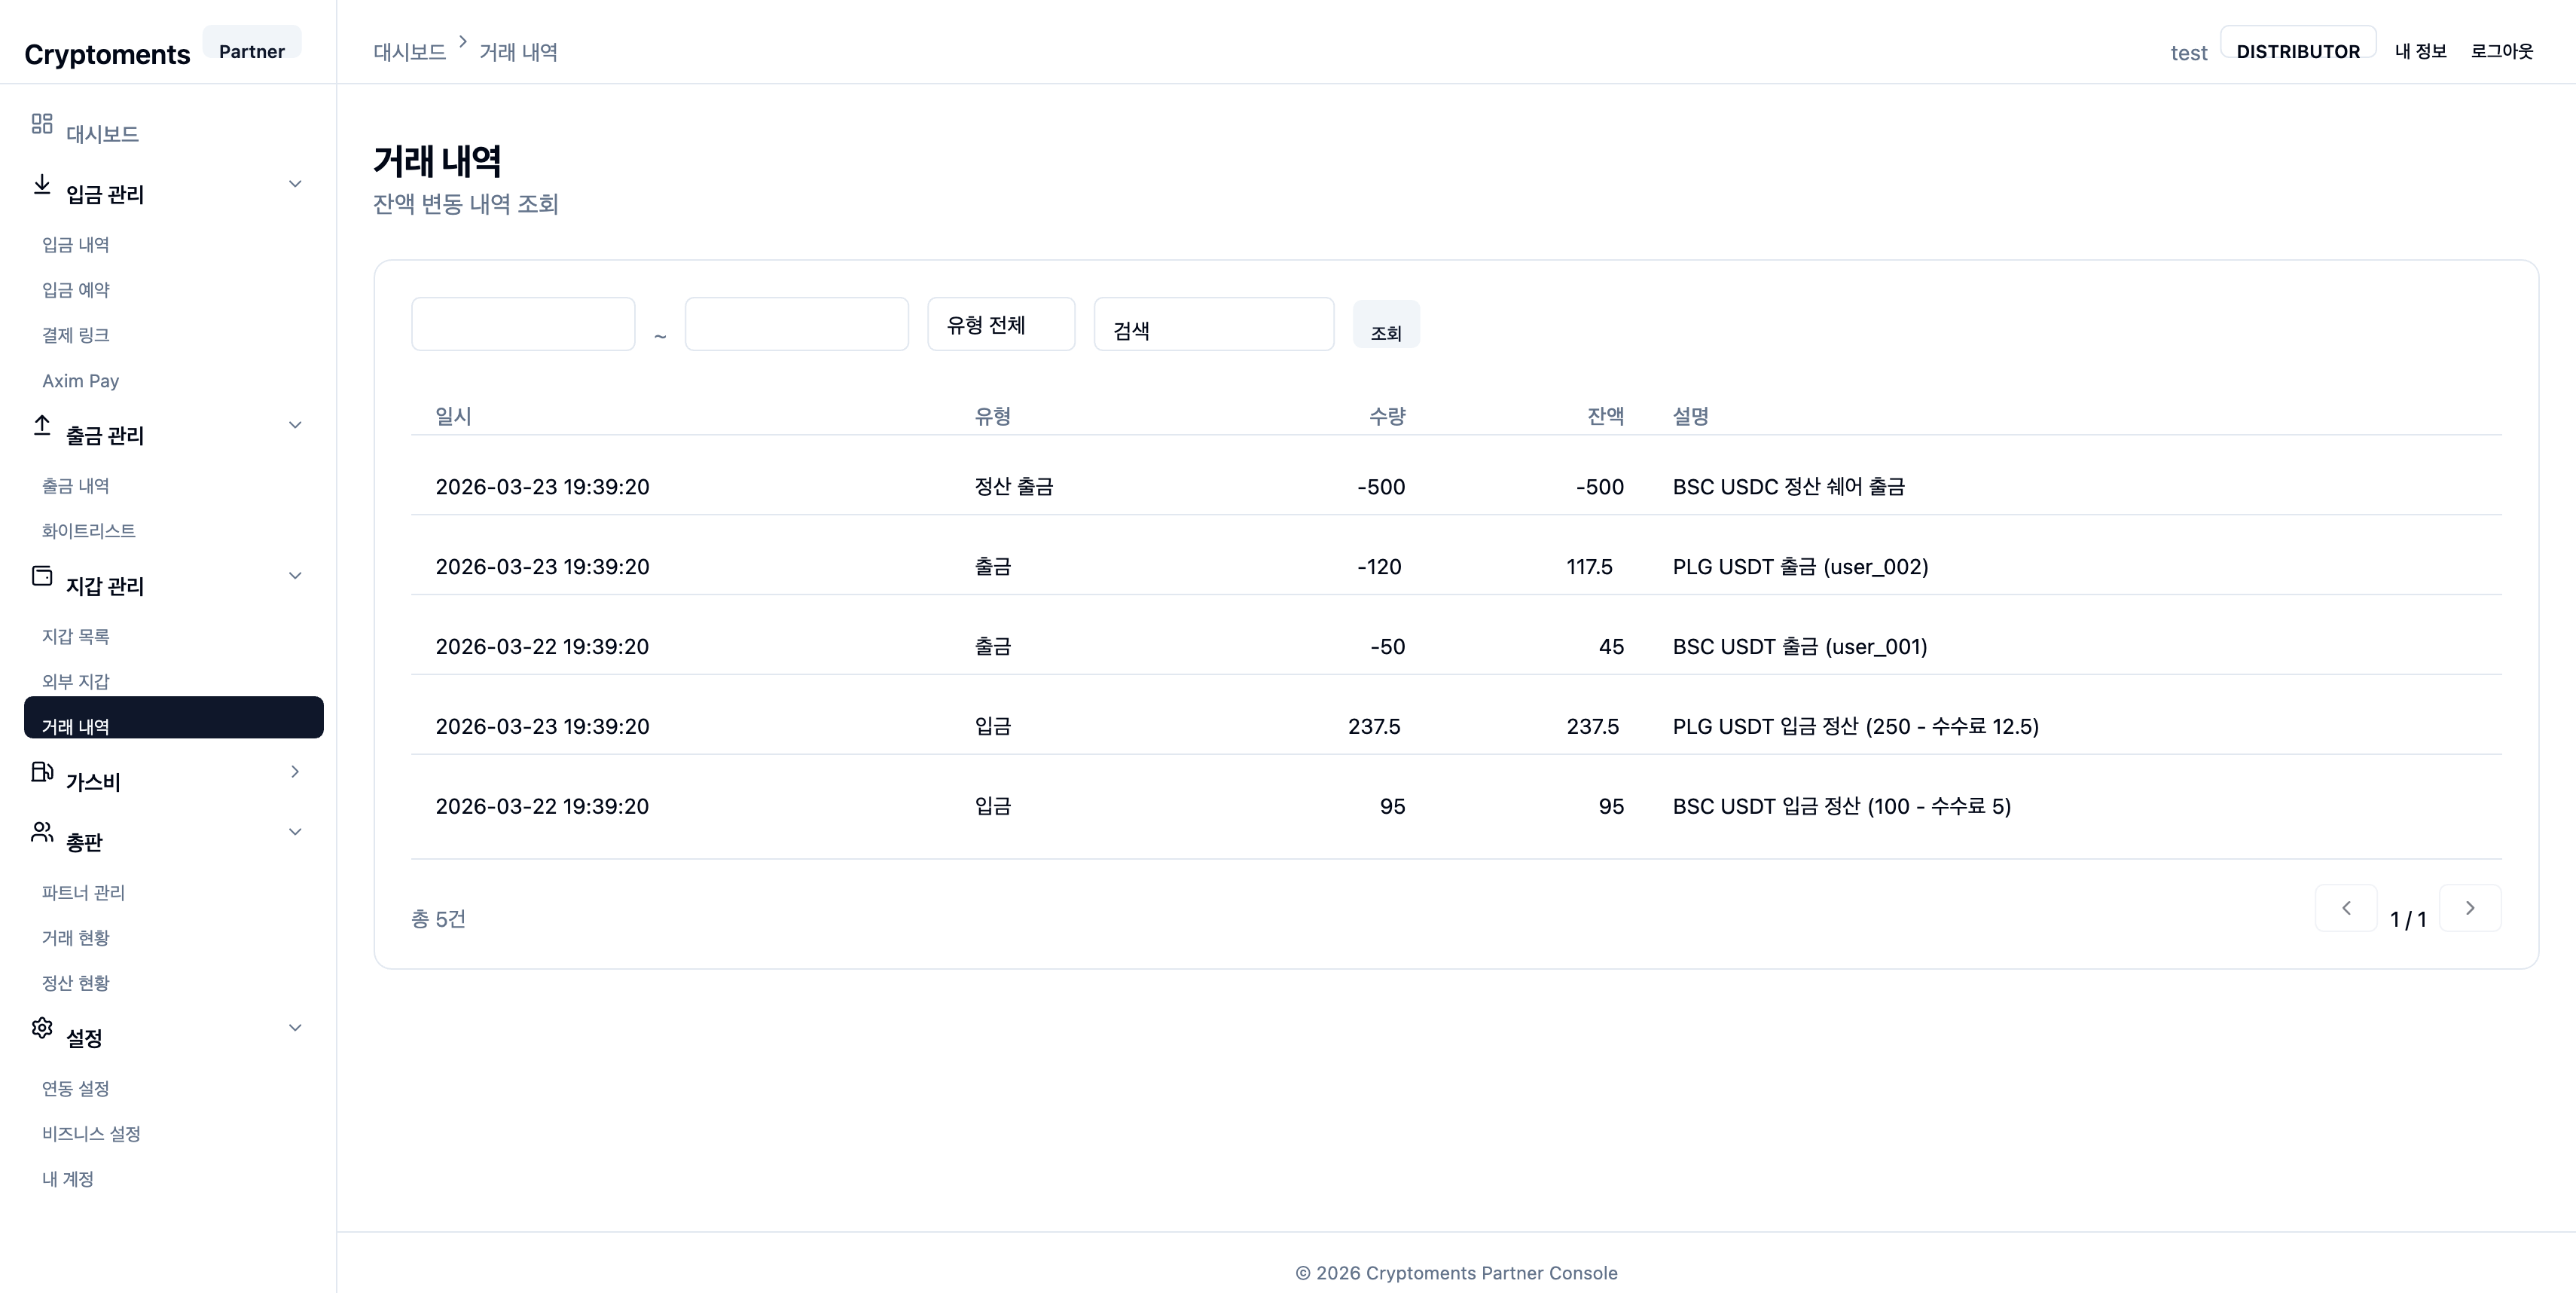
A unified view across deposits, withdrawals, sweeps, etc. Search by user ID, wallet address, TX hash, and other filters.

Transactions

7 Sub-partner Management

Sub-partner management is available only to DISTRIBUTOR-type partners.

7.1 Distributor vs Merchant

CRYPTOMENTS has two partner types:

AspectDistributor (DISTRIBUTOR)Merchant (MERCHANT)
Sub-partner managementAllowed (can register distributors + merchants)Not allowed
Fee modelparentFeeRate, maxFeeCap configurableOnly depositFeeRate applies
RevenueEarns the spread on sub-partner transactionsDirect transactions only
Tree structureCan nest distributors/merchants hierarchicallyLeaf node (no children)
DashboardSub-partner overview + revenue summaryOwn transaction overview only
💡
Distributors can nest distributors: A distributor can register another distributor underneath, forming a multi-tier distribution structure (up to 5 levels). The fee spread at each level is the distributor's revenue at that level.

7.2 Sub-partner List

Sub-partners List

Browse your registered sub-partners as a list or as a tree. Search by status, type, or partner code/name.

List View

The default list view shows your direct sub-partners as a table — partner code, name, type, status, fee rate, and more on each row.

Tree View

The tree view visualizes the hierarchy. See at a glance which merchants/distributors sit under each distributor, up to 5 levels deep.

7.3 Register a Sub-partner

Sub-partners Register

Register a new merchant or sub-distributor. 2FA is required.

Basic Info

FieldDescriptionRequired
Partner typePick MERCHANT (merchant) or DISTRIBUTOR (distributor)Required
Partner nameDisplay name of the sub-partnerRequired
Sign-in emailEmail used by the sub-partner to sign in to the consoleRequired
PasswordInitial sign-in password (8+ chars)Required

Fee Setup

The fee model depends on the sub-partner's type:

When registering a Merchant (MERCHANT)
FieldDescription
depositFeeRate Deposit fee rate applied to the merchant (%). The spread between this rate and the parent distributor's parentFeeRate is the distributor's revenue.
When registering a Sub-distributor (DISTRIBUTOR)
FieldDescription
parentFeeRate Fee rate (%) the sub-distributor pays up to its parent (you) when charging its own merchants.
maxFeeCap Maximum fee rate (%) the sub-distributor is allowed to set for its merchants.
⚠️
Fee-rate constraints:
  • minFeeRate is computed automatically: parent distributor's minFeeRate + parent's parentFeeRate
  • A merchant's depositFeeRate must be ≥ minFeeRate
  • And must be ≤ the sub-distributor's maxFeeCap
  • Changing a fee rate cascades minFeeRate recomputation across all sub-partners

Revenue Calculation Example

Scenario: Top-level admin → Distributor A → Merchant B

  • Top-level admin: minFeeRate = 0.5%
  • Distributor A: parentFeeRate = 0.3% (paid up to admin), minFeeRate = 0.8% (0.5 + 0.3)
  • Merchant B: depositFeeRate = 1.2% (effective applied fee)
  • Distributor A's revenue = 1.2% − 0.8% = 0.4%

On a 1,000 USDT deposit at Merchant B → Distributor A's revenue: 4 USDT

Chain Activation

Pick the blockchain networks and currencies the sub-partner will use. Activating a chain auto-creates the corresponding HD wallet.

7.4 Manage Sub-partners

Detail View

Click a sub-partner to view its details — basic info, fee setup, and a transaction summary (deposits/withdrawals/revenue).

Edit Info

Edit partner name, fee rates, and so on. Changing a fee rate cascades minFeeRate recomputation to all sub-partners.

Status Change

Change the sub-partner's status:

  • ACTIVE → SUSPENDED: Suspend all services for the sub-partner
  • SUSPENDED → ACTIVE: Re-activate suspended services

Reset Password

Reset the sub-partner's sign-in password to a temporary one. Share the issued temporary password with the sub-partner.

Delete Sub-partner

Only direct sub-partners can be deleted. 2FA is required, and all of the following must be true:

  • No transaction history (deposits/withdrawals)
  • No sub-partners of their own (must be a leaf node)

7.5 Activity Overview

Sub-partners Activity Overview

Summary of deposit/withdrawal activity per sub-partner. Filter by period (Today / This Week / This Month).

Drill-down

Select a sub-partner to view that partner's detailed transaction history (deposits, withdrawals, ledger).

8 P2P Matching

Sell KRW for USDT through P2P matching — matching links, P2P withdraw orders, and P2P members.

P2P matching lets your users buy USDT with Korean won (KRW) or receive KRW payouts — their orders are filled from other users' deposits and, if needed, your own service account. Cryptoments checks the incoming bank transfers for you (a quick account look-up) and pays out the USDT automatically, so you don't have to reconcile bank statements by hand. There are three screens: Matching Links, P2P Withdraw Orders, and P2P Members.

8.2 P2P Withdraw Orders

P2P P2P Withdraw Orders

Tracks the matching and settlement progress of withdrawals that were converted to P2P. An order is created when you submit a P2P Withdraw Request for a member (see 8.3) or when you convert an existing normal withdrawal to P2P.

📸
Screenshot needed — P2P Withdraw Orders list (route: /partner/p2p/withdraw-orders). Capture EN + KO.

How an order progresses

Waiting to match Partially matched Fully matched Settling Completed
Can also end as: Cancelled Expired

An order starts out waiting to match. As depositors are found it becomes partially and then fully matched, moves to settling while the money is paid out, and finishes as completed. If it isn't filled in time it can be cancelled or expire.

Order detail

Click an order to open its detail, where you can see:

  • Summary — status, user ID, KRW/USDT amount, exchange rate, the original withdrawal code, request/settled dates, and the payout bank account.
  • Match list — for each portion that gets filled, you see who deposited (their verified real name), the actual name on the incoming bank transfer (a green check appears when the two names match), whether the transfer has been confirmed, and the settlement with its blockchain payment proof. Each portion moves through waiting for the deposit → bank transfer confirmed → settled, and is flagged for review if there's a problem.
  • USDT convert request — if the user asked to receive the remainder as USDT, Approve or Reject it here.
  • Remaining handling (when the order is not terminal and has a remaining amount): Convert to withdrawal (send the remaining as USDT directly to an address), Force settle (mark as paid, with an optional memo), or Cancel (refund the remaining).
  • Receipt PDF — download a deposit confirmation (입금 확인증) PDF built from the settled matches.
⚠️
OTP required: Fund-moving actions (convert, force-settle, cancel, approve/reject USDT convert) require OTP (2FA), the same as withdrawal approval.
📸
Screenshot needed — P2P Withdraw Order detail with match cards (route: /partner/p2p/withdraw-orders/<orderCode>). Capture EN + KO.

8.3 P2P Members

P2P P2P Members

Register and manage members of your P2P withdrawal service. Each member gets a permanent withdrawal-page link they use to receive KRW payouts.

📸
Screenshot needed — P2P Members list & register drawer (route: /partner/p2p/members). Capture EN + KO.

Register a member

Click Register Member and enter the partner user ID. On registration, a fixed member page link is auto-issued in the form https://p2p.cryptoments.cc/m/<token> (permanent). Hand this link to the member.

List columns

ColumnDescription
User IDPartner user ID.
AccountWhether a bank account is registered (and how many).
Pending withdrawalSum of active orders (KRW + USDT).
Order count / StatusActive order count and member status (Active / Suspended).

Member detail

Click a member to open their detail, where you can manage:

  • Active P2P orders summary (pending withdrawal amount) and the copyable member page link.
  • Alias & memo — partner-only labels for the member.
  • Account & verification — the member's bank account and its quick-check status, which lets the system confirm their incoming deposits automatically: verified, verification expired, or not verified, along with the days left until it expires.
  • Access / security — status, whether the PIN is set, Reset PIN, and Block / Unblock page access.
  • Recent withdraw orders — click through to the order detail.
  • P2P Withdraw Request — create a P2P withdrawal for this member (OTP required).
💡
Legacy note: The old P2P deposit link (widget.cryptoments.cc/p2p/<code>) is retired and folded into Matching Links (8.1). Use matching links for new "cash → USDT" flows.

9 Settlement

Fee revenue, TORQ rebates, and P2P revenue shares — plus settlement withdrawals.

9.1 Settlement Overview

Settlement

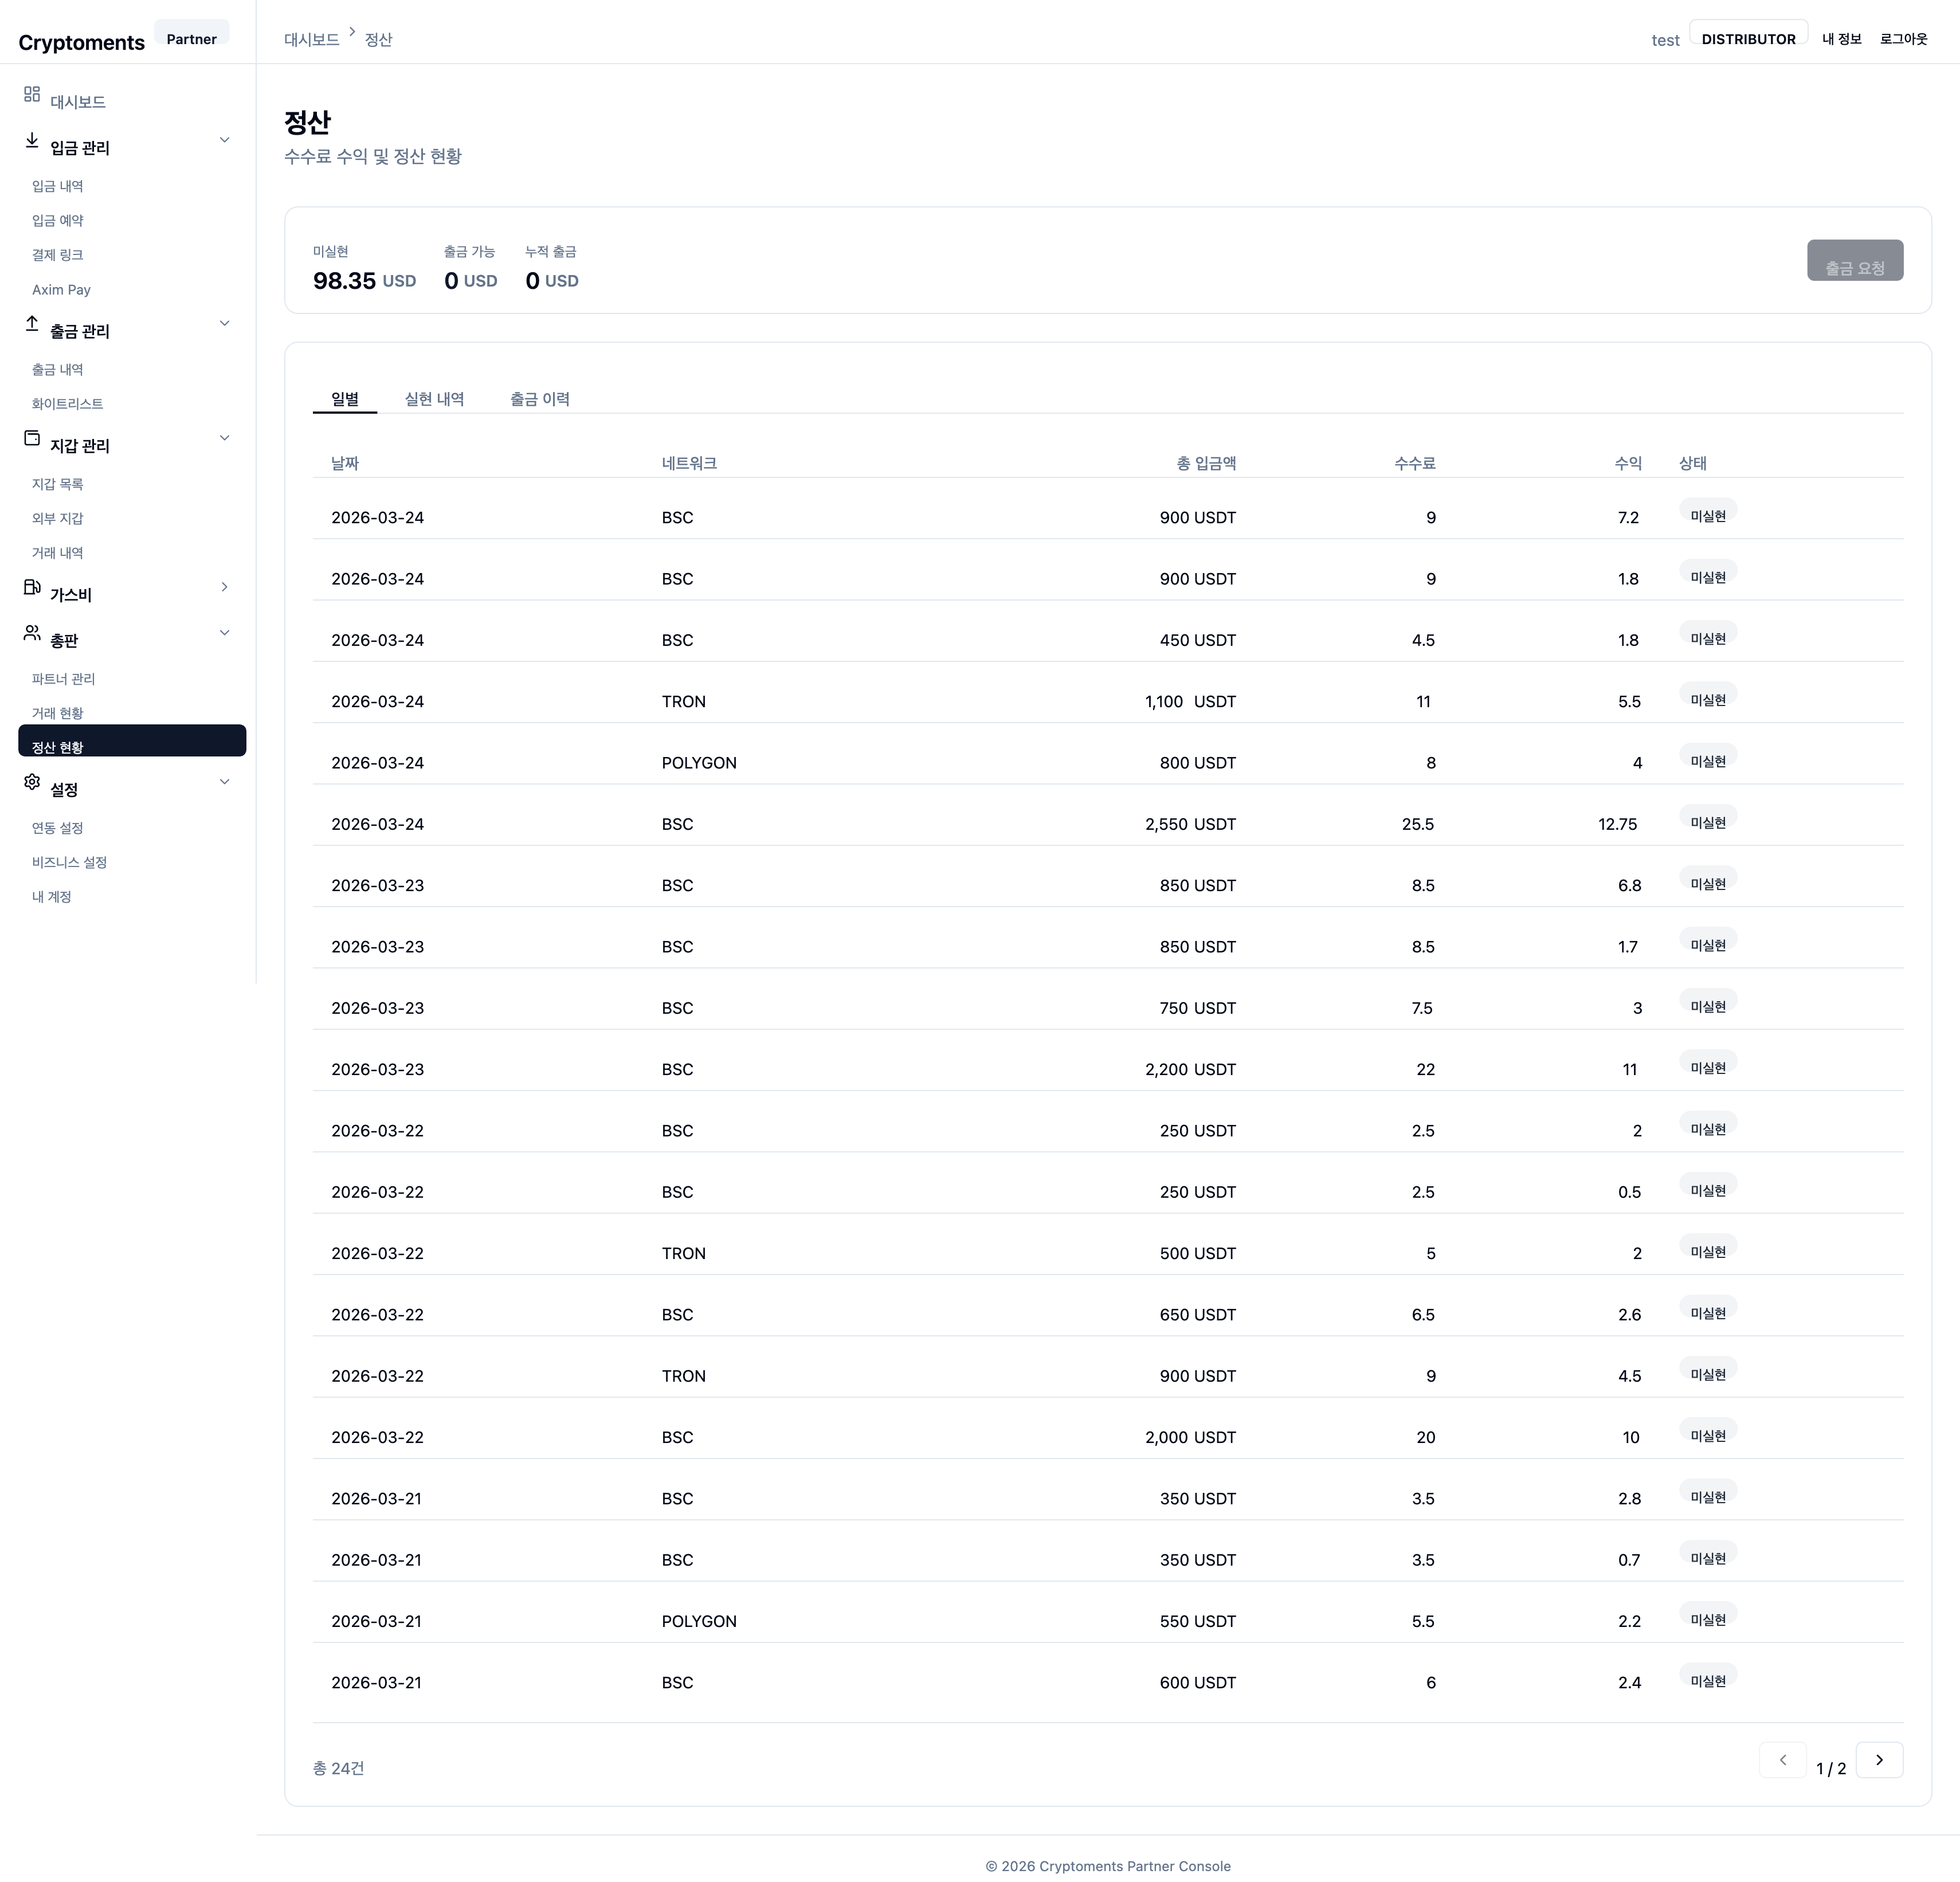
Shows your fee-revenue balance and settlement activity. The balance summary reports three USD figures: Unrealized (accrued but not yet realized), Withdrawable (realized and available), and Total withdrawn (cumulative). When the withdrawable balance is positive you can click Request withdrawal.

Settlement overview

Tabs

  • Daily — per-day, per-network deposit total, fee, and share (revenue) with status.
  • Realizations — settlements that have been finalized, by period and network: the revenue amount, its blockchain payment proof, status, and completion date. Each entry is labelled by where the revenue came from — fee revenue, P2P revenue, or TORQ rebate.
  • Withdraw history — your settlement withdrawals: request date, network, amount, destination address, blockchain payment proof, and status.

Request a settlement withdrawal

In the withdrawal drawer, pick the network and currency, enter an amount (use MAX to fill the withdrawable balance), and provide the destination address.

9.2 Rebates (TORQ)

Settlement Rebates

TORQ settlement rebate history — the rebate you earn from TORQ P2P escrow trades.

📸
Screenshot needed — Rebates list + rebate detail (routes: /partner/settlement/rebates and /rebates/<id>). Capture EN + KO.
ColumnDescription
PeriodSettlement period (from ~ to).
Status / CreditedSettlement status and whether the rebate was paid.
Escrow countNumber of settled escrow (trade) rows.
Rebate totalSum of rebate (USDT).

Click a row to open the rebate detail, which lists each trade: trade date, escrow ID, buyer, seller (LP), trade amount (USDT), confirmed rate (%), and rebate amount.

9.3 P2P Shares

Settlement P2P Shares

Your partner share of P2P settlement revenue.

📸
Screenshot needed — P2P Shares list + share detail (routes: /partner/settlement/p2p-shares and /p2p-shares/<id>). Capture EN + KO.
ColumnDescription
PeriodSettlement period (from ~ to).
Currency / NetworkSettled currency and network.
Partner payoutYour share paid out (USDT).
StatusSettlement status.

Click a row to open the share detail, which breaks each trade into: settled date, match code, buyer, deposit amount (USDT), fee, withdrawer bonus, system keep, and your share.

10 Gas Management

Review on-chain gas usage and monthly invoices.

10.1 Gas Records

Gas Gas Records

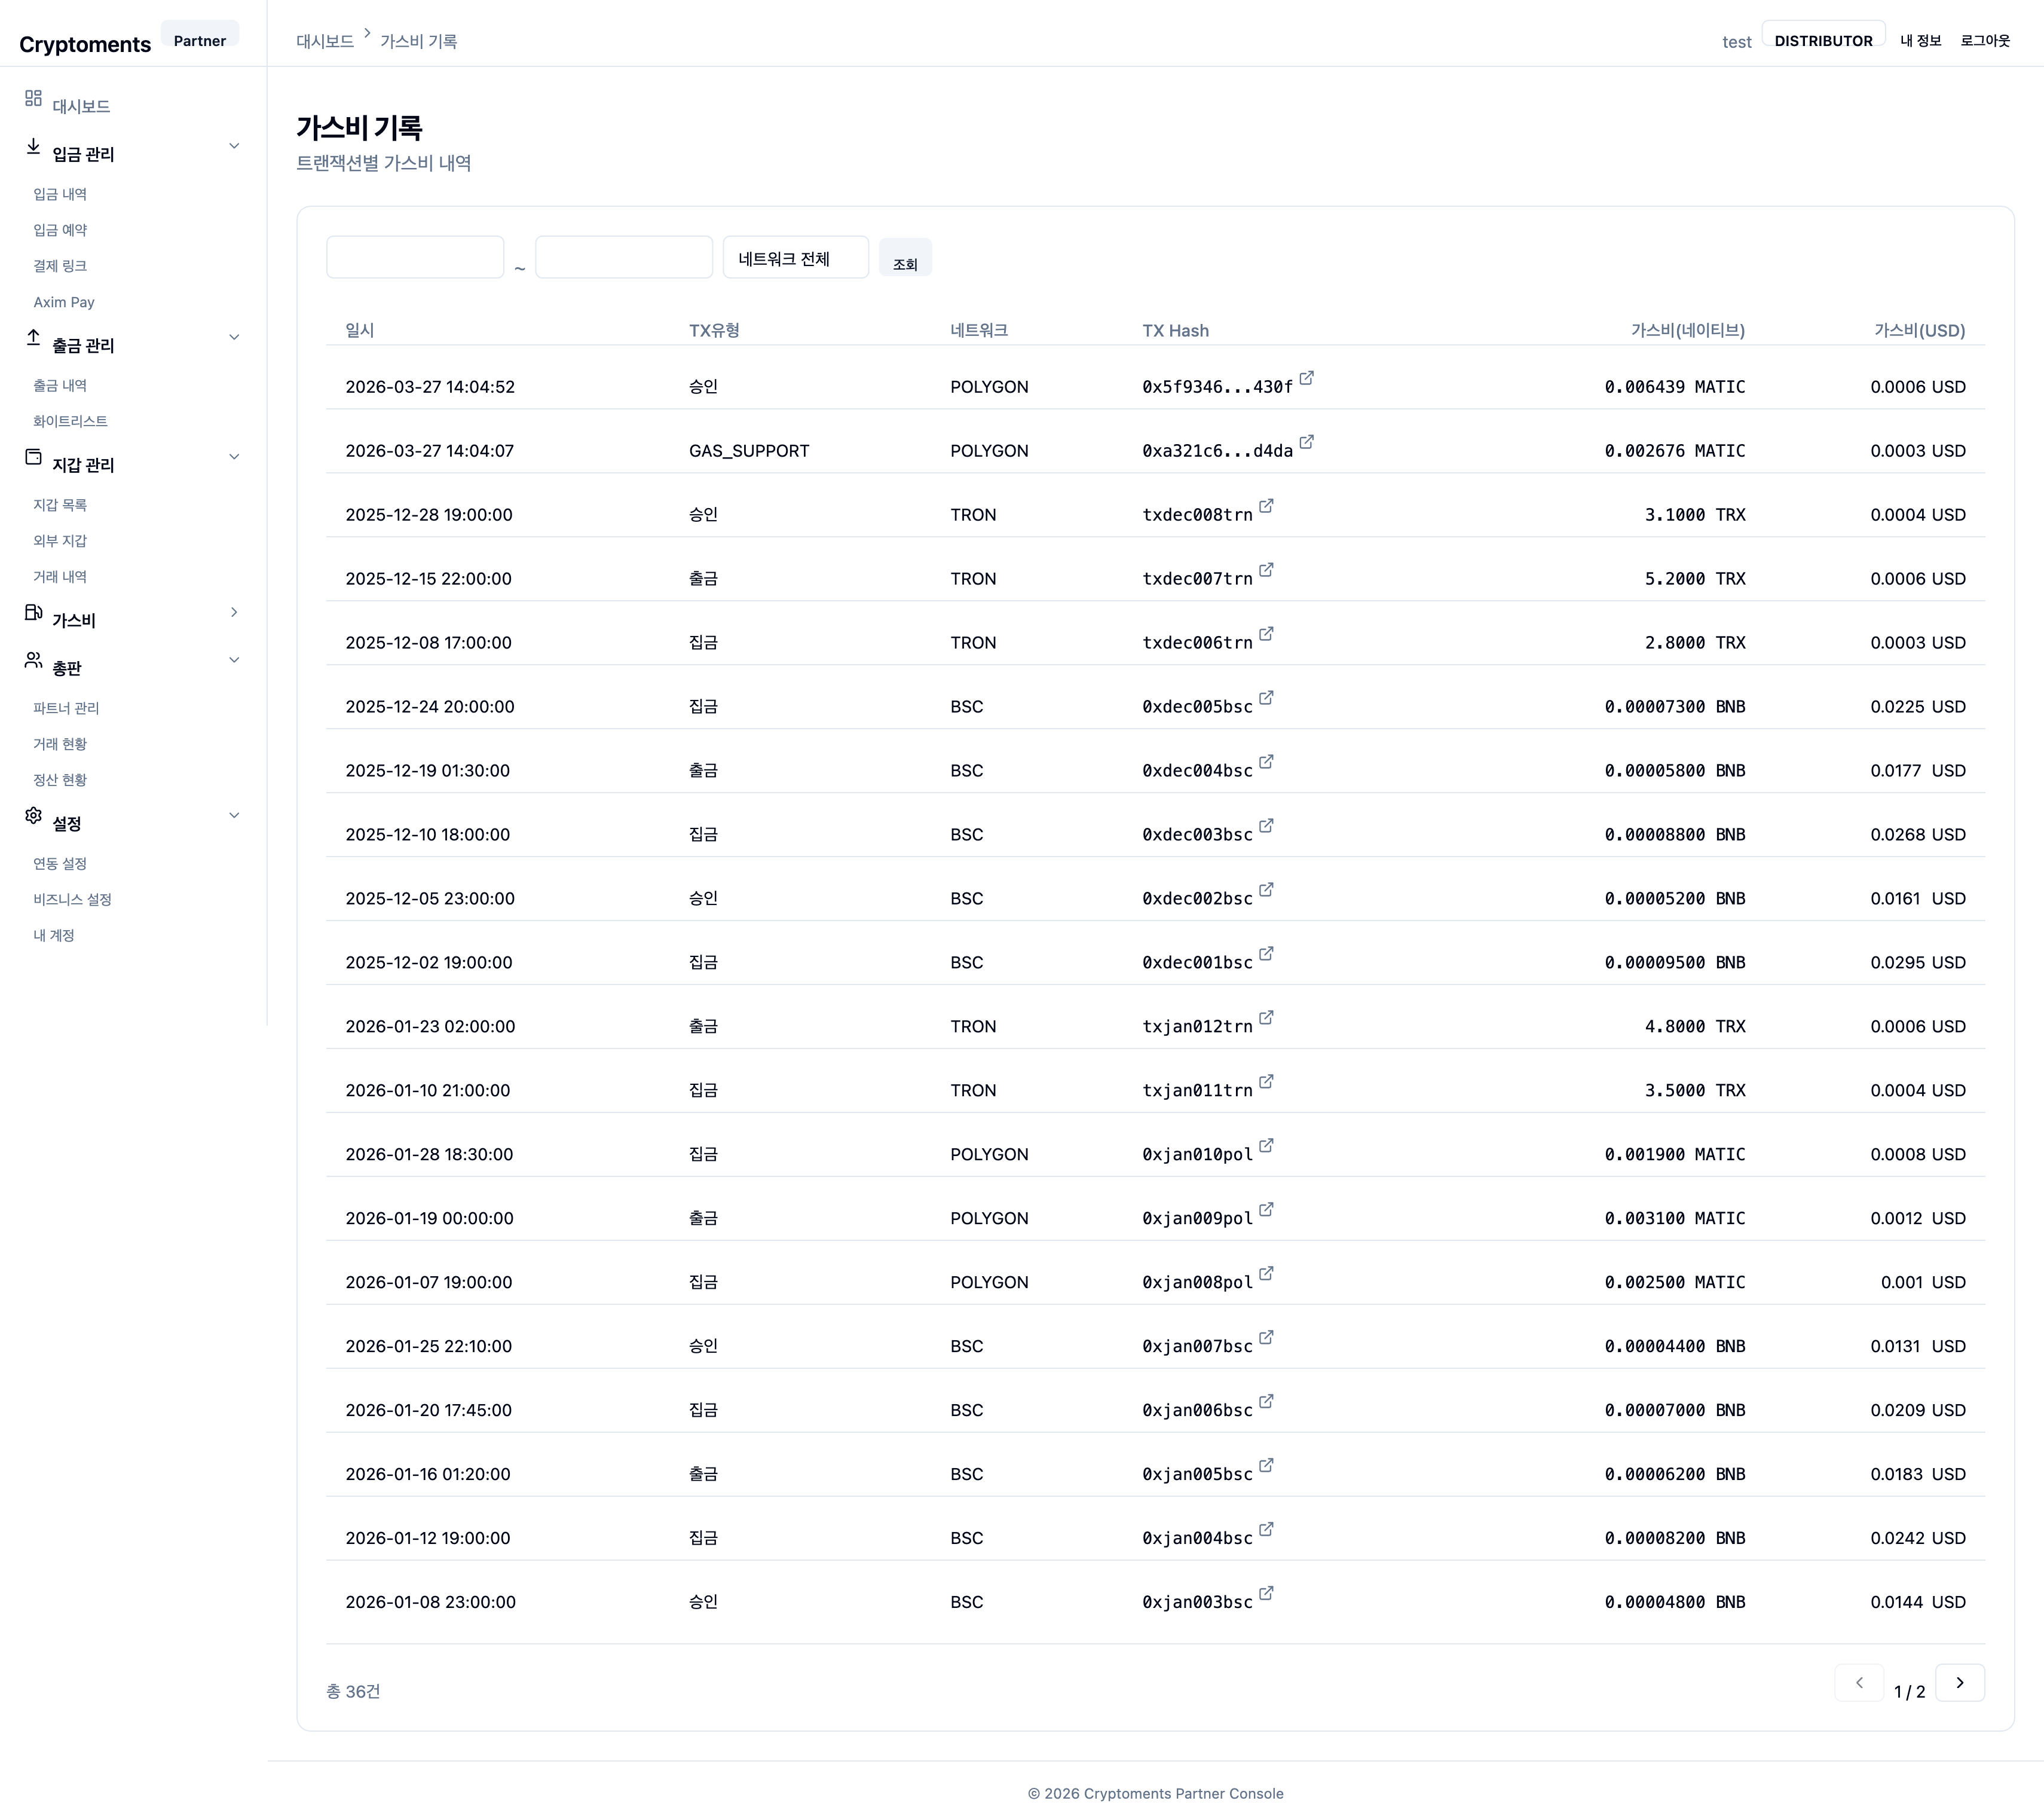
Browse gas consumed by on-chain transactions (sweep, withdrawal, Approve, etc.) record by record. Shows the gas amount in the network's native token (BNB, POL, TRX) along with the USD equivalent.

Gas records

10.2 Invoices

Gas Invoices

Browse monthly gas invoices. Each invoice includes per-network gas totals, the total amount, and the issuance status.

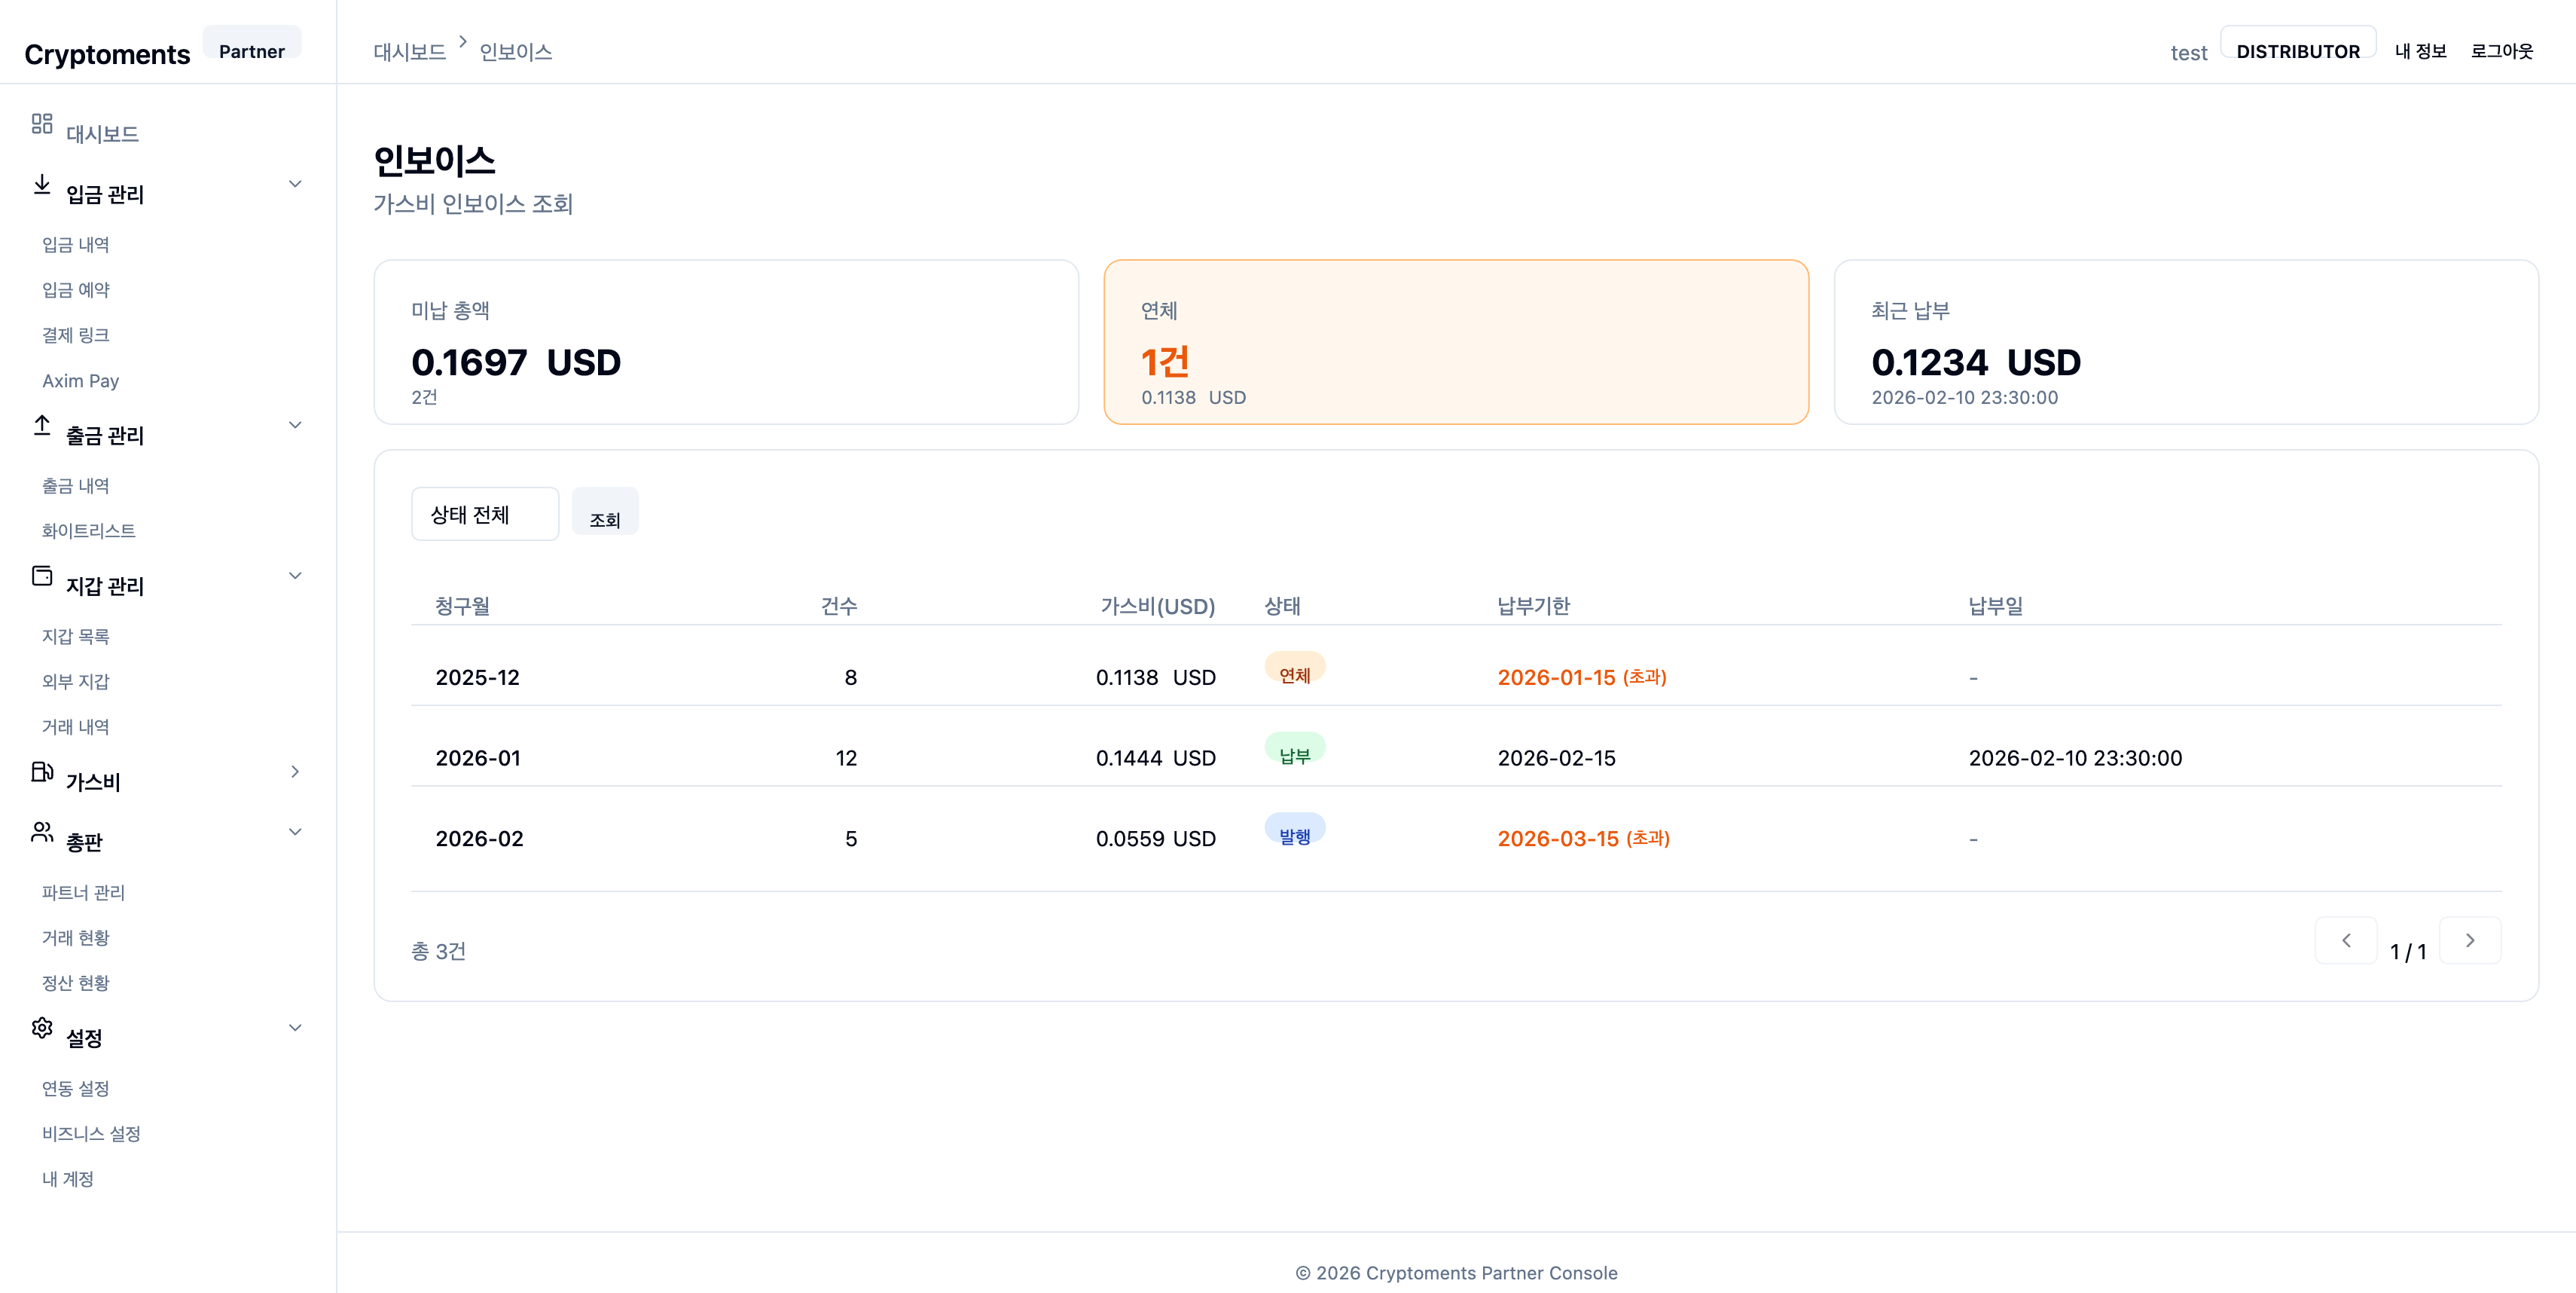
Invoice list
💡
Invoice detail: Click an invoice to open the detail page, which shows per-network gas aggregates and individual transactions.

11 Settings

Manage API integrations, business policies, and account settings.

11.1 Integrations

Settings Integrations

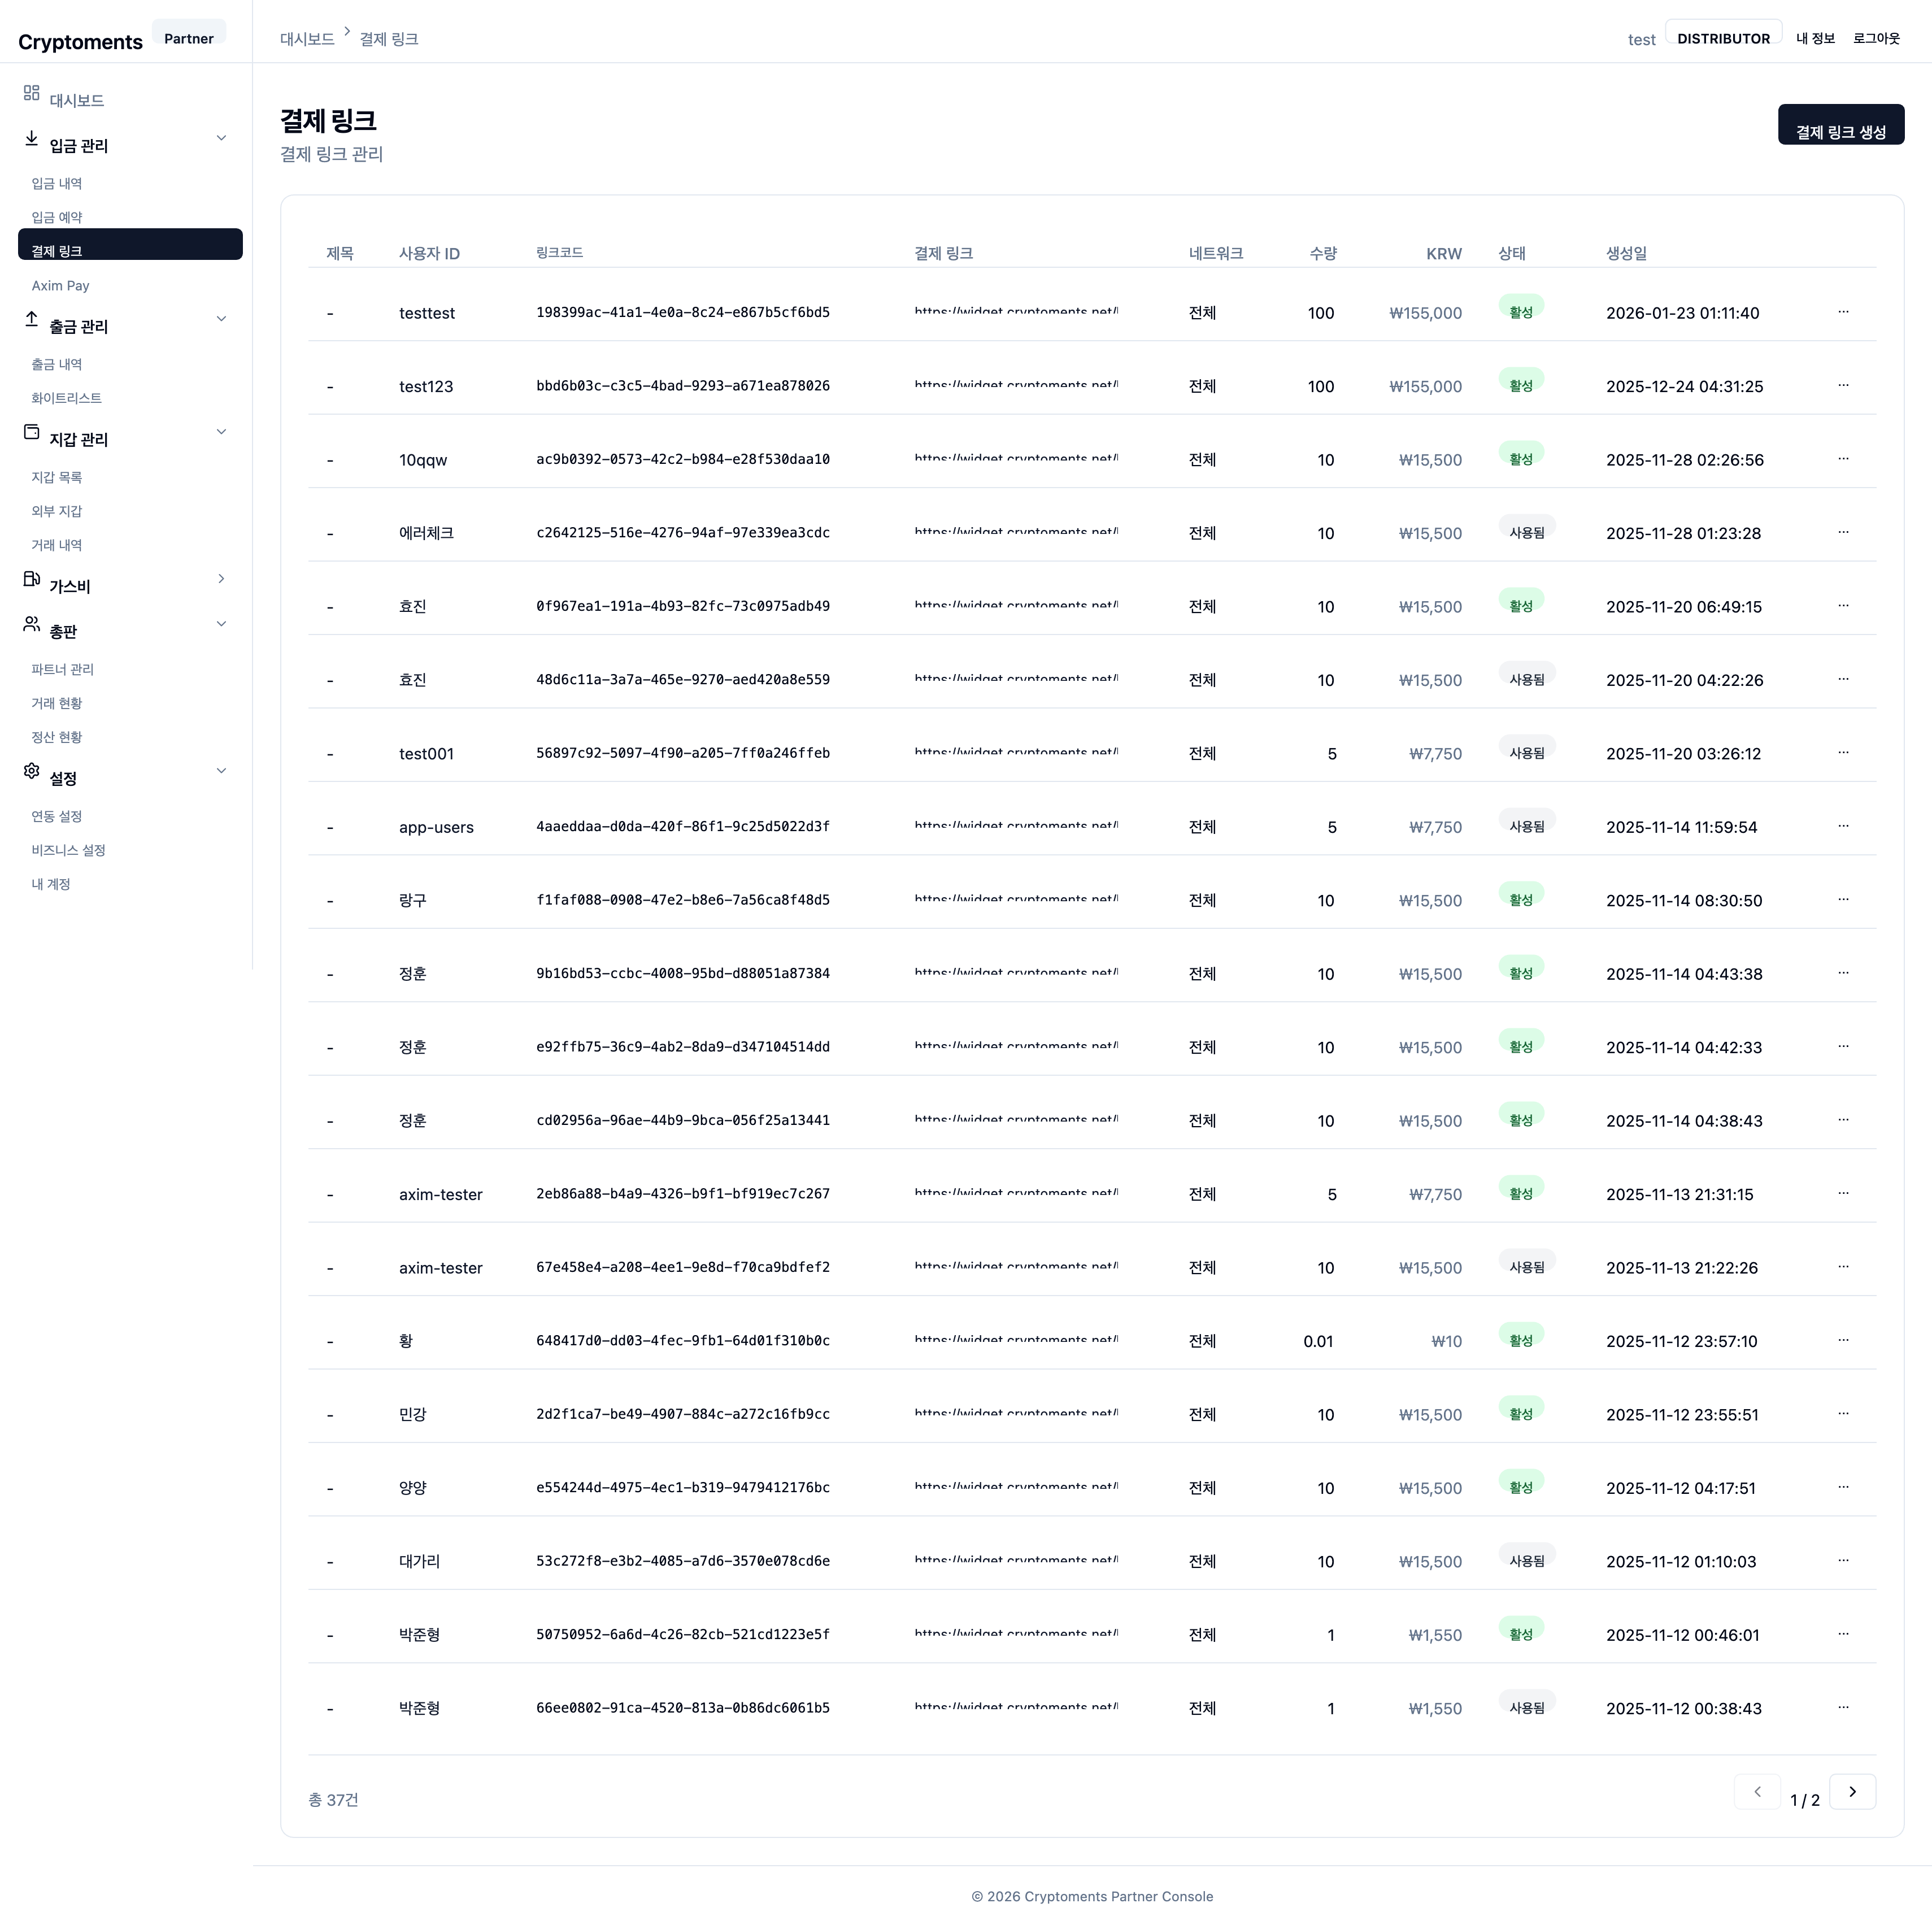
Configure the integration channels under separate tabs: API Keys, Webhook, Telegram, Axim Pay, and Phonepay.
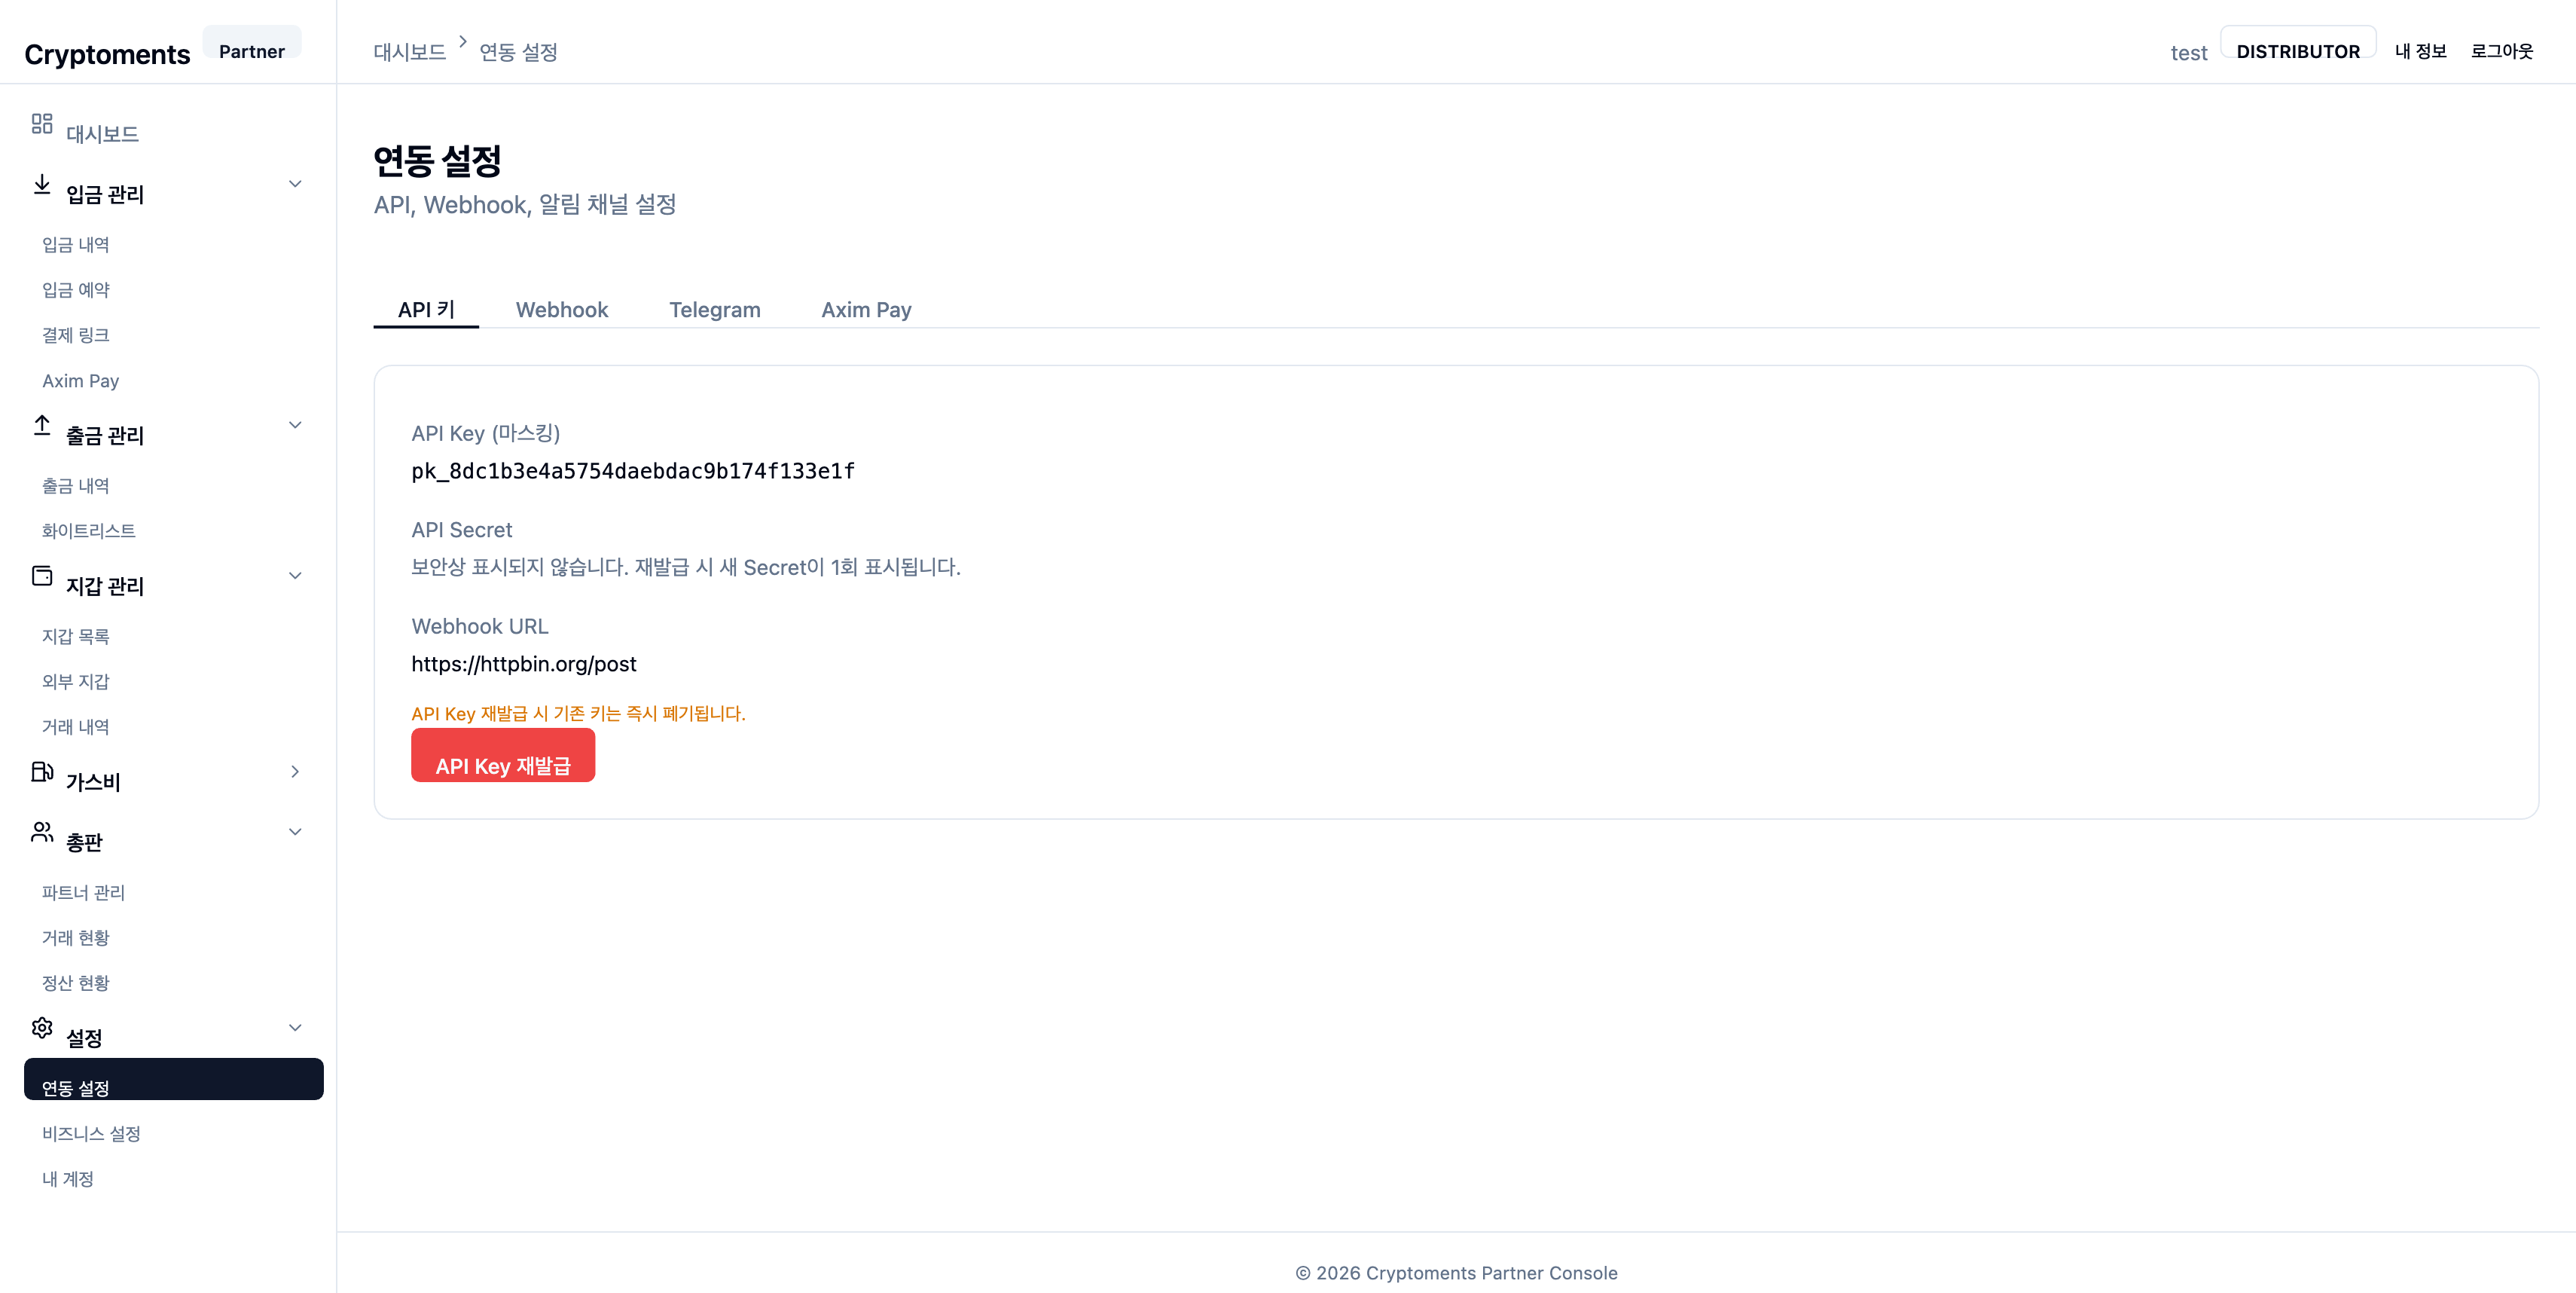
Integrations screen
Integrations — settings under the API Keys, Webhook, Telegram, Axim Pay, and Phonepay tabs

API Keys

View your partner API Key and Secret under the API Keys tab.

🔒
Security warning: Never expose your API Key and Secret. The Secret is shown only at issuance time and cannot be retrieved afterwards.

Webhook Settings

Set the callback URL for deposit/withdrawal events under the Webhook tab.

Events such as deposit confirmation and withdrawal completion are delivered in real time to the configured URL. This is required when integrating via the API.

Test delivery: After setting the Webhook URL, use the "Send Test" button to verify your endpoint receives events correctly.

Telegram Notifications

Configure the Telegram bot notifications under the Telegram tab.

1
Scan the QR or open the link

On the Telegram tab, scan the displayed QR code with the Telegram mobile app, or switch to Link and tap @CryptomentsBot. Use "Reissue token" if the code expired.

2
Complete the connection in Telegram

The bot opens and links automatically. The console polls and updates the state to connected (Chat ID) once done — no manual command needed.

3
Toggle notifications and test

Use the ON / OFF switch to pause or resume alerts, and Send Test to confirm delivery. Disconnect unlinks the bot (OTP required for 2FA partners).

Supported notification types:

Notification typeDescription
Deposit detected (DEPOSIT_DETECTED)When a deposit TX is detected on-chain (awaiting block confirmation)
Deposit confirmed (DEPOSIT_CONFIRMED)When the deposit is confirmed on-chain
Large deposit (LARGE_DEPOSIT)When a deposit exceeds the configured threshold
Withdrawal requested (WITHDRAWAL_REQUESTED)When a new withdrawal request is received
Withdrawal approved (WITHDRAWAL_APPROVED)When a withdrawal request is approved
Withdrawal rejected (WITHDRAWAL_REJECTED)When a withdrawal request is rejected by an administrator
Withdrawal completed (WITHDRAWAL_CONFIRMED)When a withdrawal is confirmed on-chain
Withdrawal failed (WITHDRAWAL_FAILED)When an error occurs during withdrawal processing
Withdrawal cancelled (WITHDRAWAL_CANCELLED)When a withdrawal request is cancelled
⚠️
Operational recommendation: For stable operation and fast incident response, keep Telegram bot notifications ON. Insufficient-balance and low-gas alerts in particular are essential to prevent withdrawal-service outages.

Axim Pay

Configure the Axim Pay payment integration under the Axim Pay tab. Shown only to partners with Axim Pay enabled.

Phonepay

Enable KRW deposits via BanqPipe under the Phonepay tab. Enter the BanqPipe API Key (bpk_...) and save — Phonepay activates and its callback URL is registered to BanqPipe automatically. When active, the tab shows the masked API key and the callback URL. Deactivate deletes the stored API key (you must re-enter it to use Phonepay again).

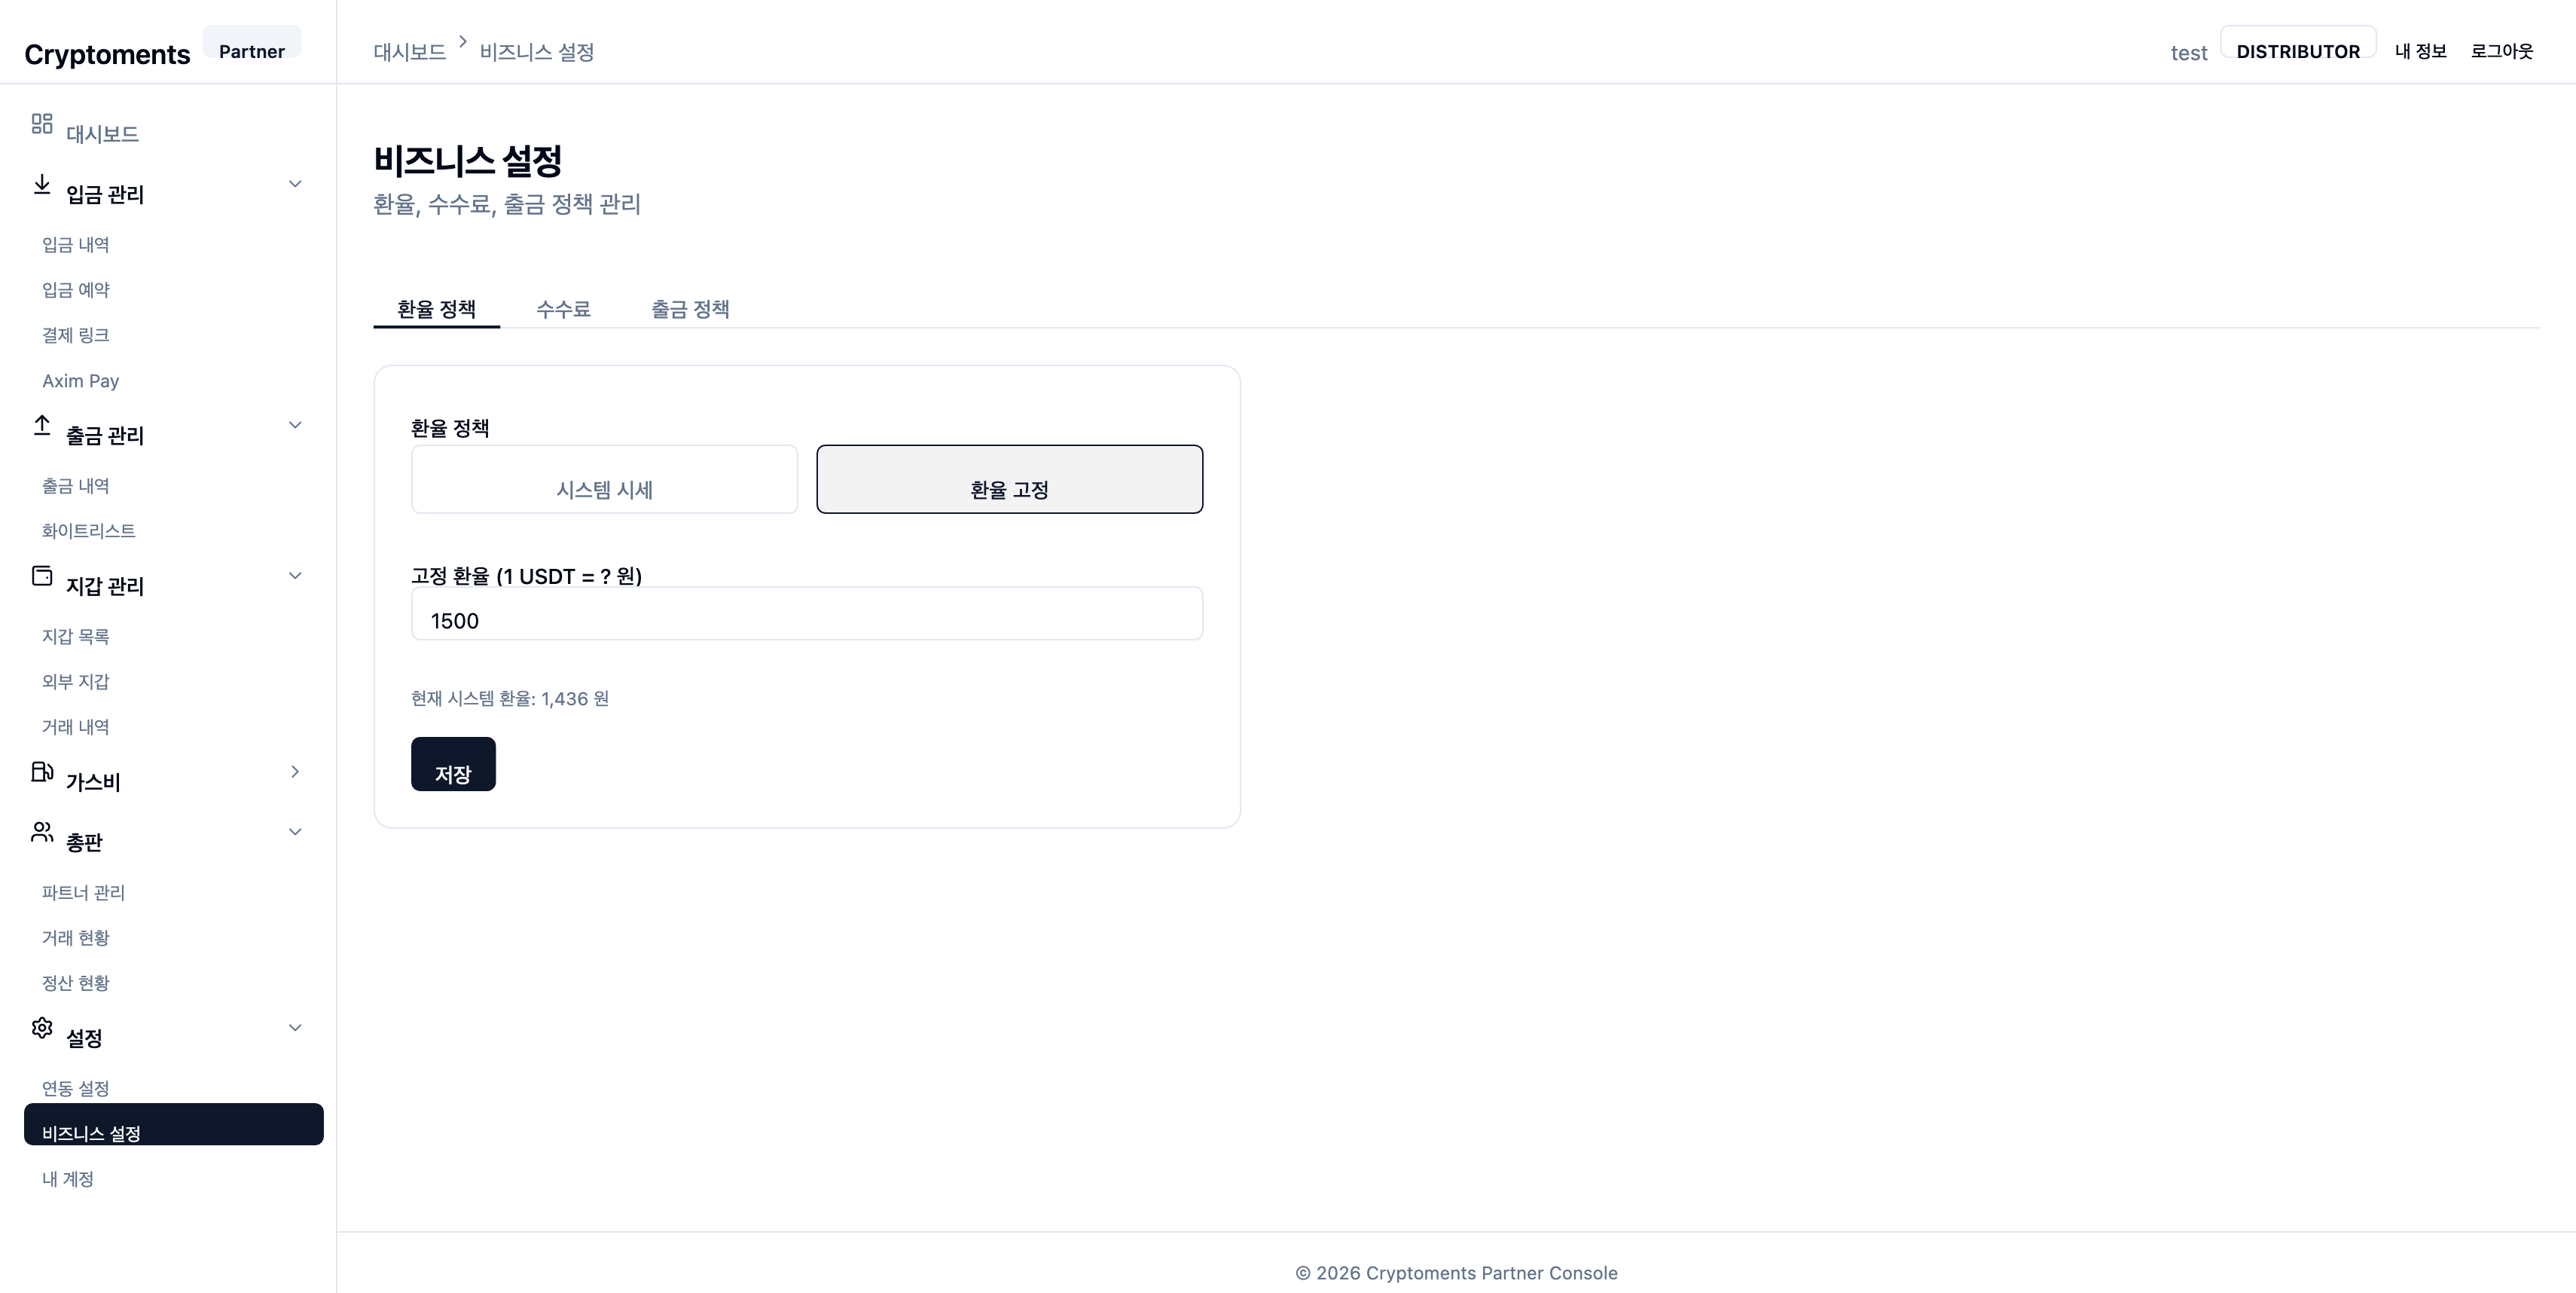
11.2 Business Settings

Settings Business Settings

Configured under separate tabs: FX Policy, Fees, Withdrawal Policy, and P2P.

Business settings screen

FX Policy

Choose how the KRW exchange rate is applied under the FX Policy tab.

  • System rate — inherit the live system exchange rate automatically.
  • Fixed rate — set your own rate (1 USDT = ? KRW).

The current system rate is shown for reference. Saving requires OTP.

Fee Settings

Under the Fees tab you can see the inherited limits — parent fee rate, cumulative minimum fee rate, and maximum fee cap (read-only) — and set your own deposit fee rate within the min~max range. Setting it to 0 means you do not accept direct deposits. Saving requires OTP.

Withdrawal Policy

Configure withdrawal approval behavior under the Withdrawal Policy tab.

ModeDescription
Auto approvalAll withdrawal requests are processed automatically.
Conditional manual approvalOnly withdrawals above the configured USDT threshold require manual approval.
💡
Security recommendation: We strongly recommend "Conditional manual approval" mode to prevent large-withdrawal incidents.

P2P

Under the P2P tab, the P2P service on/off and the P2P fee rate (borne by the buyer) are read-only — set by your distributor / operator. Here you register your service account: one partner bank account used to cover the remaining amount when a P2P order can't be fully filled by individual withdrawers. Registering it signs in with your bank's quick-check login (which lets the system confirm incoming deposits automatically) and requires OTP; the tab then shows the auto deposit-confirmation status and when it expires.

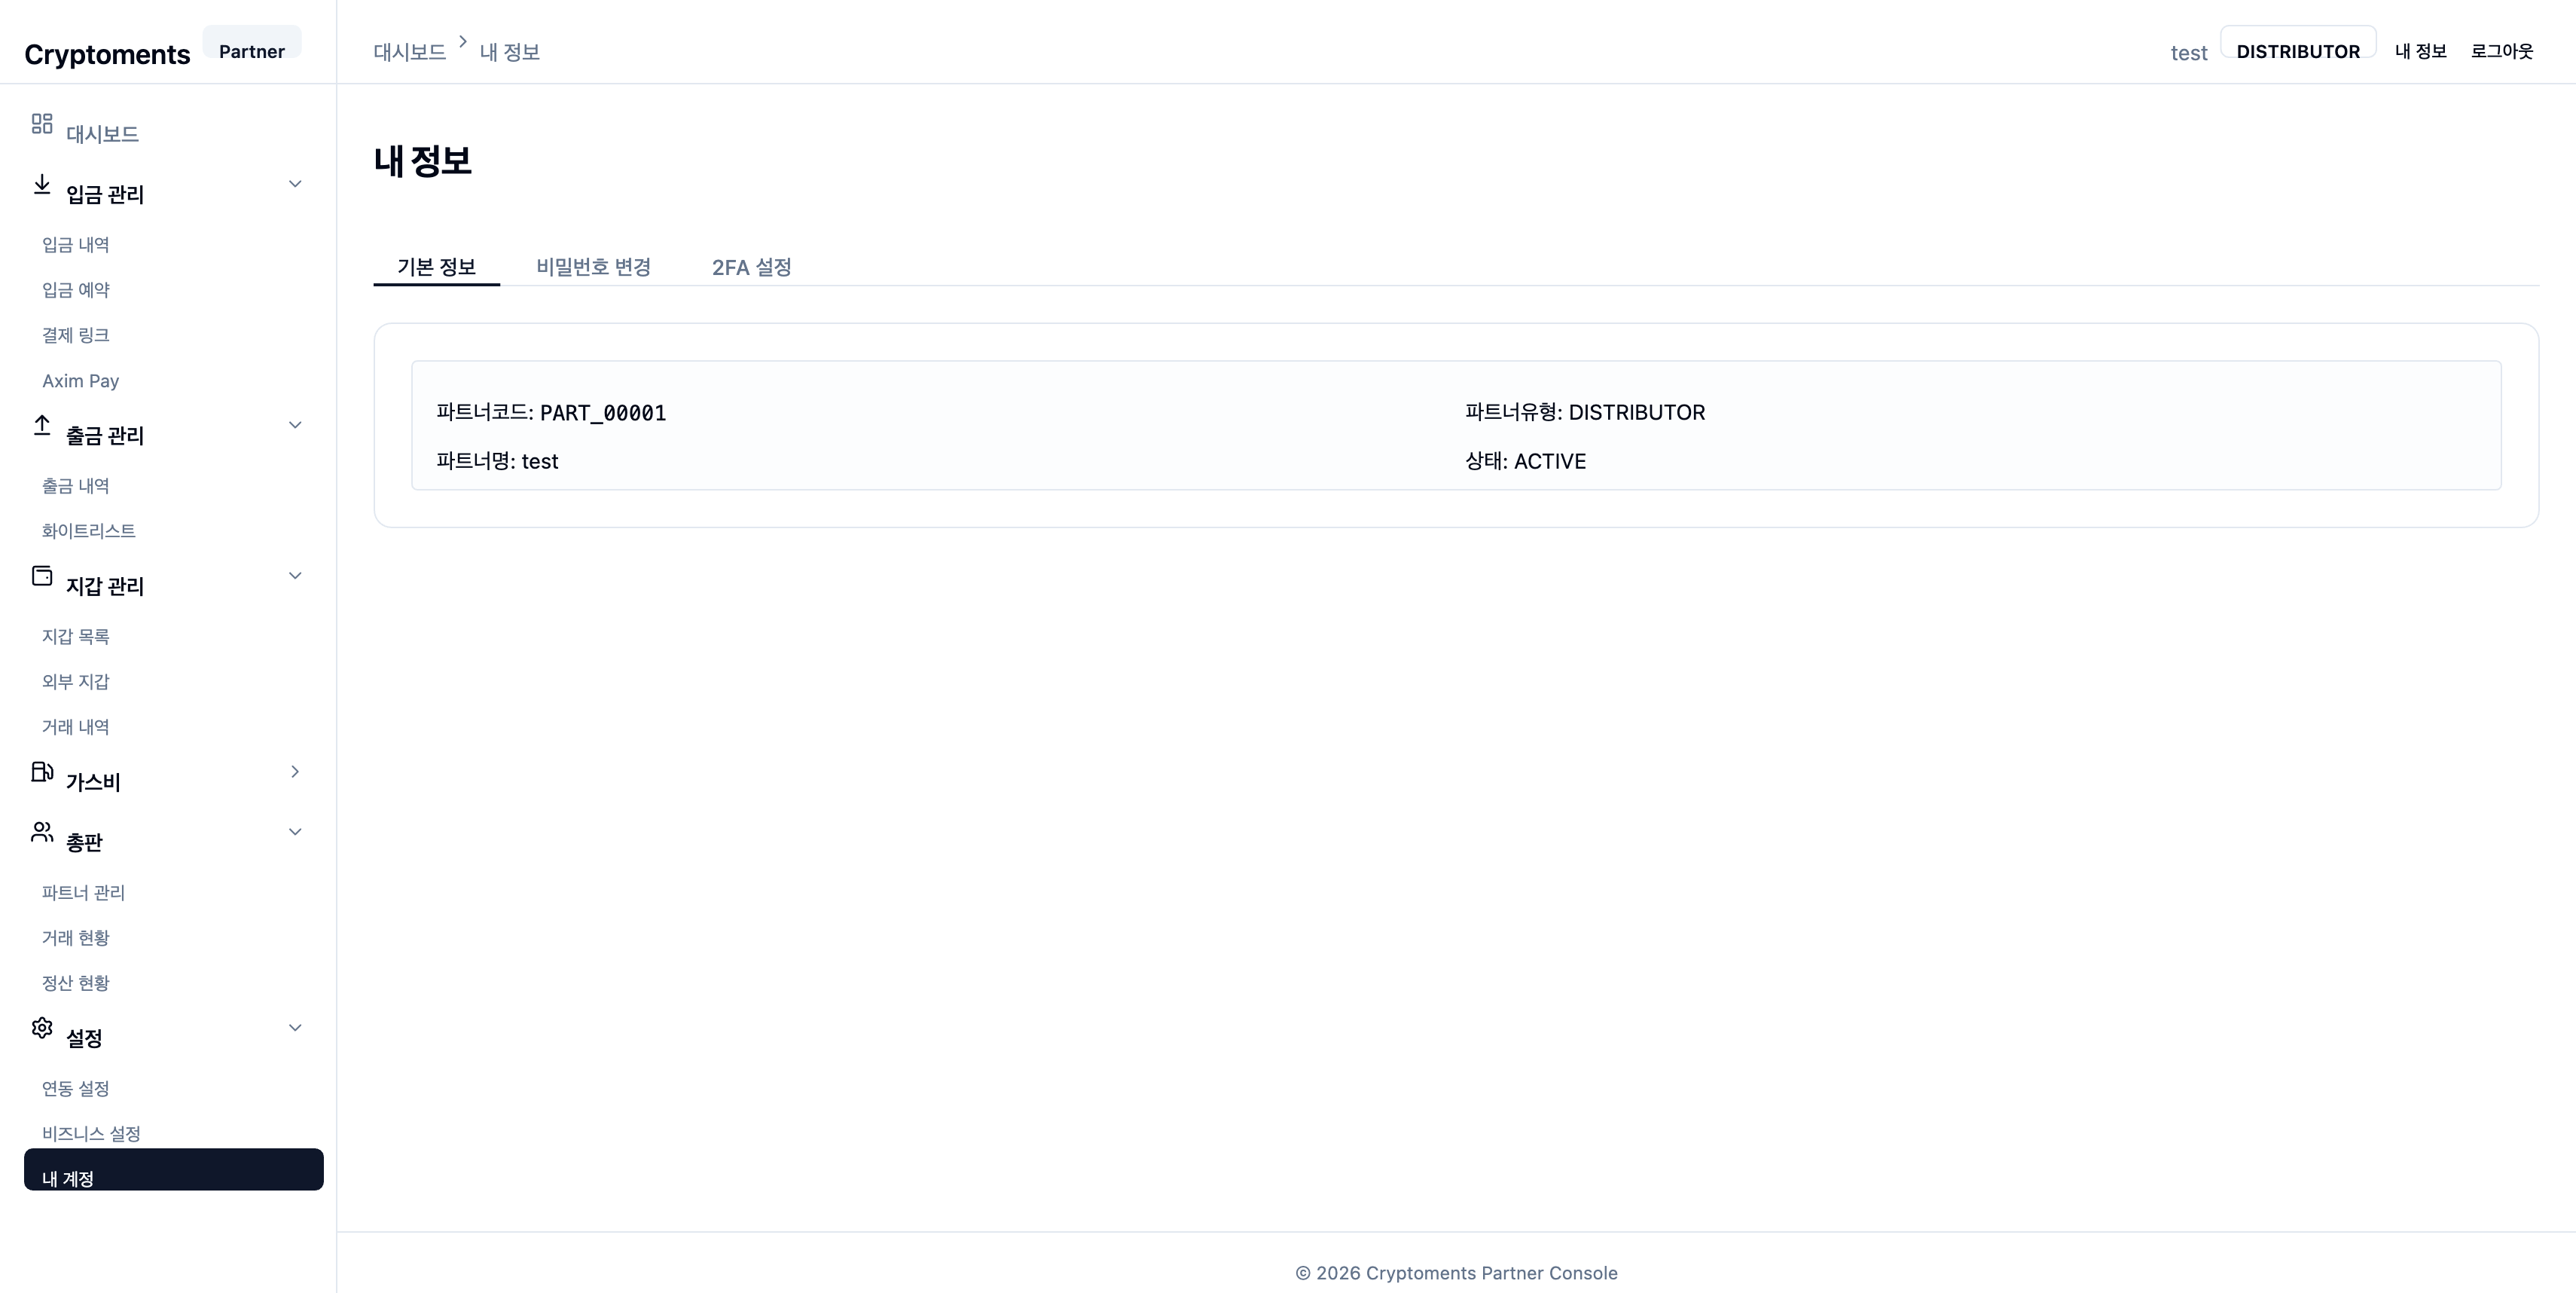
11.3 My Account

Settings My Account

My account screen

Basic Info

View basic account info — partner code, type (merchant/distributor), partner name, status, and so on.

Change Password

Change your password by entering the current password and a new one. Passwords must contain 8+ characters, mixing letters, digits, and special characters. OTP authentication is required.

2FA Settings

Manage enable/disable of 2FA (OTP). See 2.2 2FA Setup for detailed setup steps.
12 Status Flow

State transitions during deposit and withdrawal processing.

12.1 Deposit Status Flow

DETECTED CONFIRMING CONFIRMED COLLECTING COLLECTED SETTLED
Branch: FAILED
StatusDisplay nameDescription
DETECTEDDetectedA deposit transaction was detected on-chain.
CONFIRMINGConfirmingWaiting for block confirmations.
CONFIRMEDConfirmedThe required confirmation count has been met.
COLLECTINGSweepingMoving funds from the HOT wallet to the MASTER wallet.
COLLECTEDSweptThe sweep to the MASTER wallet is complete.
SETTLEDSettledSettlement processing is complete.
FAILEDFailedAn error occurred during processing.

12.2 Withdrawal Status Flow

REQUESTED PENDING_APPROVAL APPROVED PROCESSING BROADCASTING CONFIRMED
Branches: REJECTED FAILED CANCELLED
StatusDisplay nameDescription
REQUESTEDRequestedThe withdrawal request was received.
PENDING_APPROVALPending approvalWaiting for manual administrator approval.
APPROVEDApprovedThe withdrawal is approved and awaiting processing.
PROCESSINGProcessingThe withdrawal transaction is being prepared.
BROADCASTINGBroadcastingThe transaction has been broadcast to the network.
CONFIRMEDConfirmedThe transaction has been confirmed on-chain.
REJECTEDRejectedAn administrator rejected the withdrawal.
FAILEDFailedAn error occurred during withdrawal processing.
CANCELLEDCancelledThe withdrawal was cancelled.

13 Frequently Asked Questions (FAQ)

Common questions and answers about using the Partner Console.

{{ faq.q[lang] }}
{{ faq.a[lang] }}